Evading disasters
 In this article we study the Cisco Unified Communications Manager (CUCM) failure recovery system that is called Disaster Recovery System (DRS). You can use it to create system backups stored on SFTP server to be used for system recovery, if needed.
DRS includes the following components:
- Cisco Unified Communications Manager database (CCMDB), including Cisco Unified Communications Manager/CDR Analysis and Reporting/Call Detail Records);
- Platform;
- Music On Hold (MOH);
- BAT Bulk Provisioning Service (BPS);
- CCM Preference Files (CCMPREFS);
- TFTP Phone device files (TFTP);
- SNMP Syslog Component (SYSLOGAGT SNMP);
- SNMP CDP Subagent (CDPAGT SNMP);
- Trace Collection Tool (TCT);
- Cluster Manager (CLM);
- Cisco Extended Functions (CEF);
Configuration
First of all, you have to deploy an SFTP server to create a backup. Cisco recommends using such clients as Cygwin, Titan FTP, GlobalSCAPE EFT, but you can use other clients as well. Download a client of your choice, install it on the workstation that will use an SFTP server, configure the connection parameters, select the root directory and run the service.
Now open the CUCM configuration page. Select Disaster Recovery System in a dropdown menu in the upper right corner.

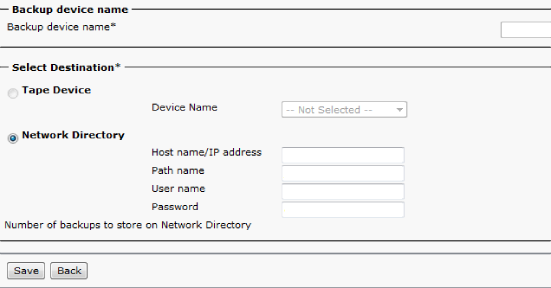
Then proceed to Backup → Backup Device and click Add New. In the form that appears, enter the backup name in Backup device name field. Select Network Directory in Select Destination section and enter the SFTP server IP address in Host name/IP address field. Enter the user credentials in User name and Password fields. Enter the path to store the data in Path name field (type ’’\’’ if the data should be stored in the root directory). Then click Save. If the SFTP server is available, you’ll see the message: Update Successful.
Now you can create a backup. Open Backup → Manual Backup, select the previously chosen backup parameters and click Start Backup.
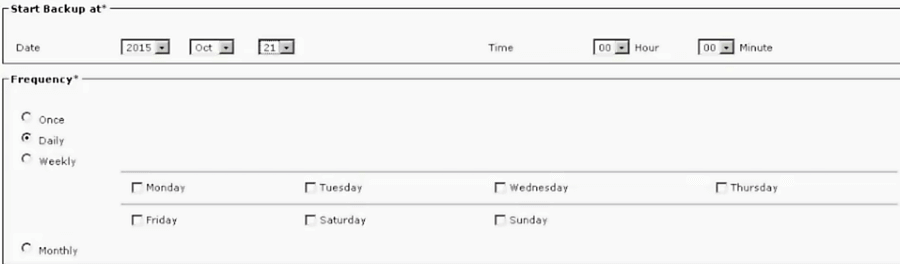
To create a backup schedule, proceed to Backup → Scheduler and click Add New. Select a backup, enter the time of archiving and click Save. Then click Enable Schedule at the top of the screen.
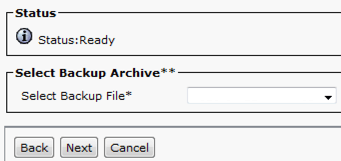
Let’s look into system recovery, which is called Restoring a Node or Cluster to a Last Known Good Configuration (No Rebuild). To restore the system from a previously created backup, proceed to Disaster Recovery System → Restore → Restore Wizard. Select Backup Device, then click Next and choose one of the available files.
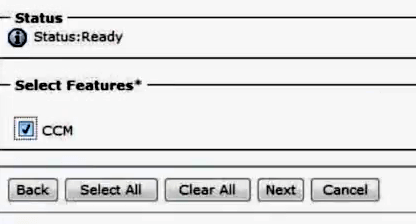
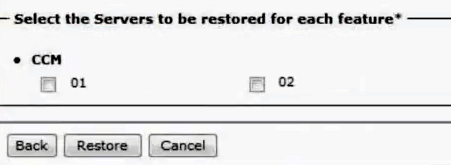
Select the features to be restored.
Then select the servers and click Restore.
The system recovery will begin. You can see the current recovery status here: Disaster Recovery System → Restore → Status. After the system is restored, you’ll have to reboot the server. You can check the replication status using either CUCM Unified RTMT (Call Manager → Database Summary → Replication Status, the status should be same for all the nodes) or CUCM Unified Reporting (Unified Reporting → System Reports → Unified CM Database Status, look for “All servers have a good replication status” line), or through CLI (execute the following command: utils dbreplication status to get “No Errors or Mismatches found. Replication status is good on all available servers” as the result).