Certificates
 Expressway servers need certificates to communicate with each other. That’s why root and intermediate certificates of the CAs that issued certificates for your servers must be listed as trusted.
Proceed to Maintenance menu > Security > Trust CA certificate. Upload those root and intermediate certificates.
In our case, the certificate for Expressway-C was issued by a local CA, which is equivalent to self-signed, and Expressway-E has a certificate issued by Let’s Encrypt (a free certificate that must be renewed every 3 months). Expressway has an auto renewal feature that will be described below.
Concerning the free Let’s Encrypt certificates:
- Open intermediate certificate and root certificate links.
- To be accepted by Expressway, a .p7b chain must be converted into a root certificate.
In Windows 10:
a. Right click on this file and select Open with > Crypto Shell Extensions
b. Right click on DST Root CA X3, select All Tasks, Export and Save.
In Linux, convert p7b to pem using this command:
openssl pkcs7 -inform der -in dstrootcax3.p7c -print_certs -out dstrootcax3.pem - Copy the internals of an intermediate certificate into notepad and save it.
- Upload both certificates to Expressway-E, Trust CA section.
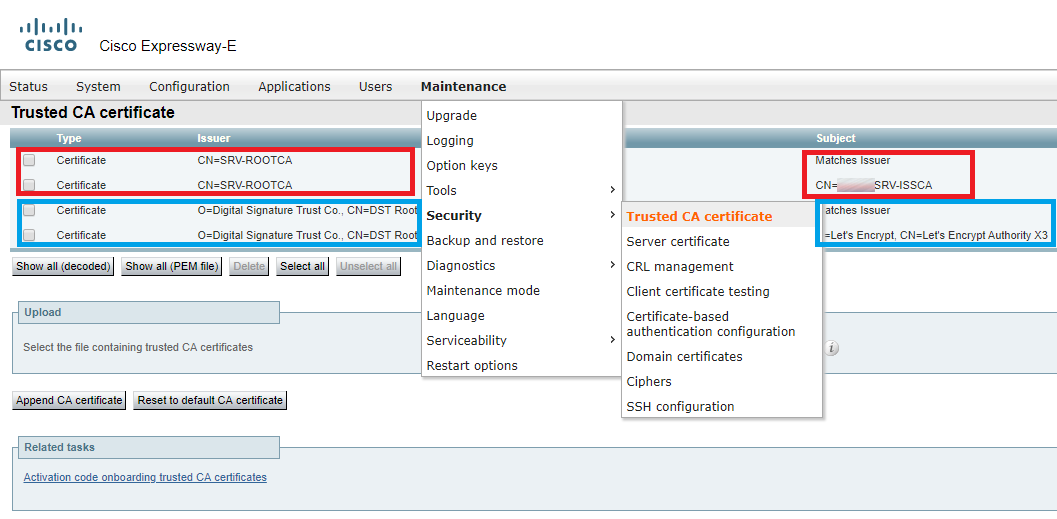
Root and intermediate certificates of a local CA are marked in red.
Root and intermediate certificates of Let’s Encrypt CA are marked in blue.
- Generate a certificate signing request for Expressway-C.

No subject alternative names are needed for Expressway-C.
In Unified CM phone security profile names, you should enter the Phone Security Profiles created in Unified CM, but this setting is only needed for TLS interactions between Expressway-C and CUCM. In our scenario, it is not needed.
- Send the request to the private CA, get a certificate and upload it to Expressway-C.
- Generate a certificate signing request for Expressway-E in a similar way. Add a SAN: join.example.com, example.com or collab-edge.example.com, if there’s a DNS A record for example.com pointing at your corporate website IP address. You also have to create a DNS A record for collab-edge.example.com in the external DNS server, or the request will be rejected.
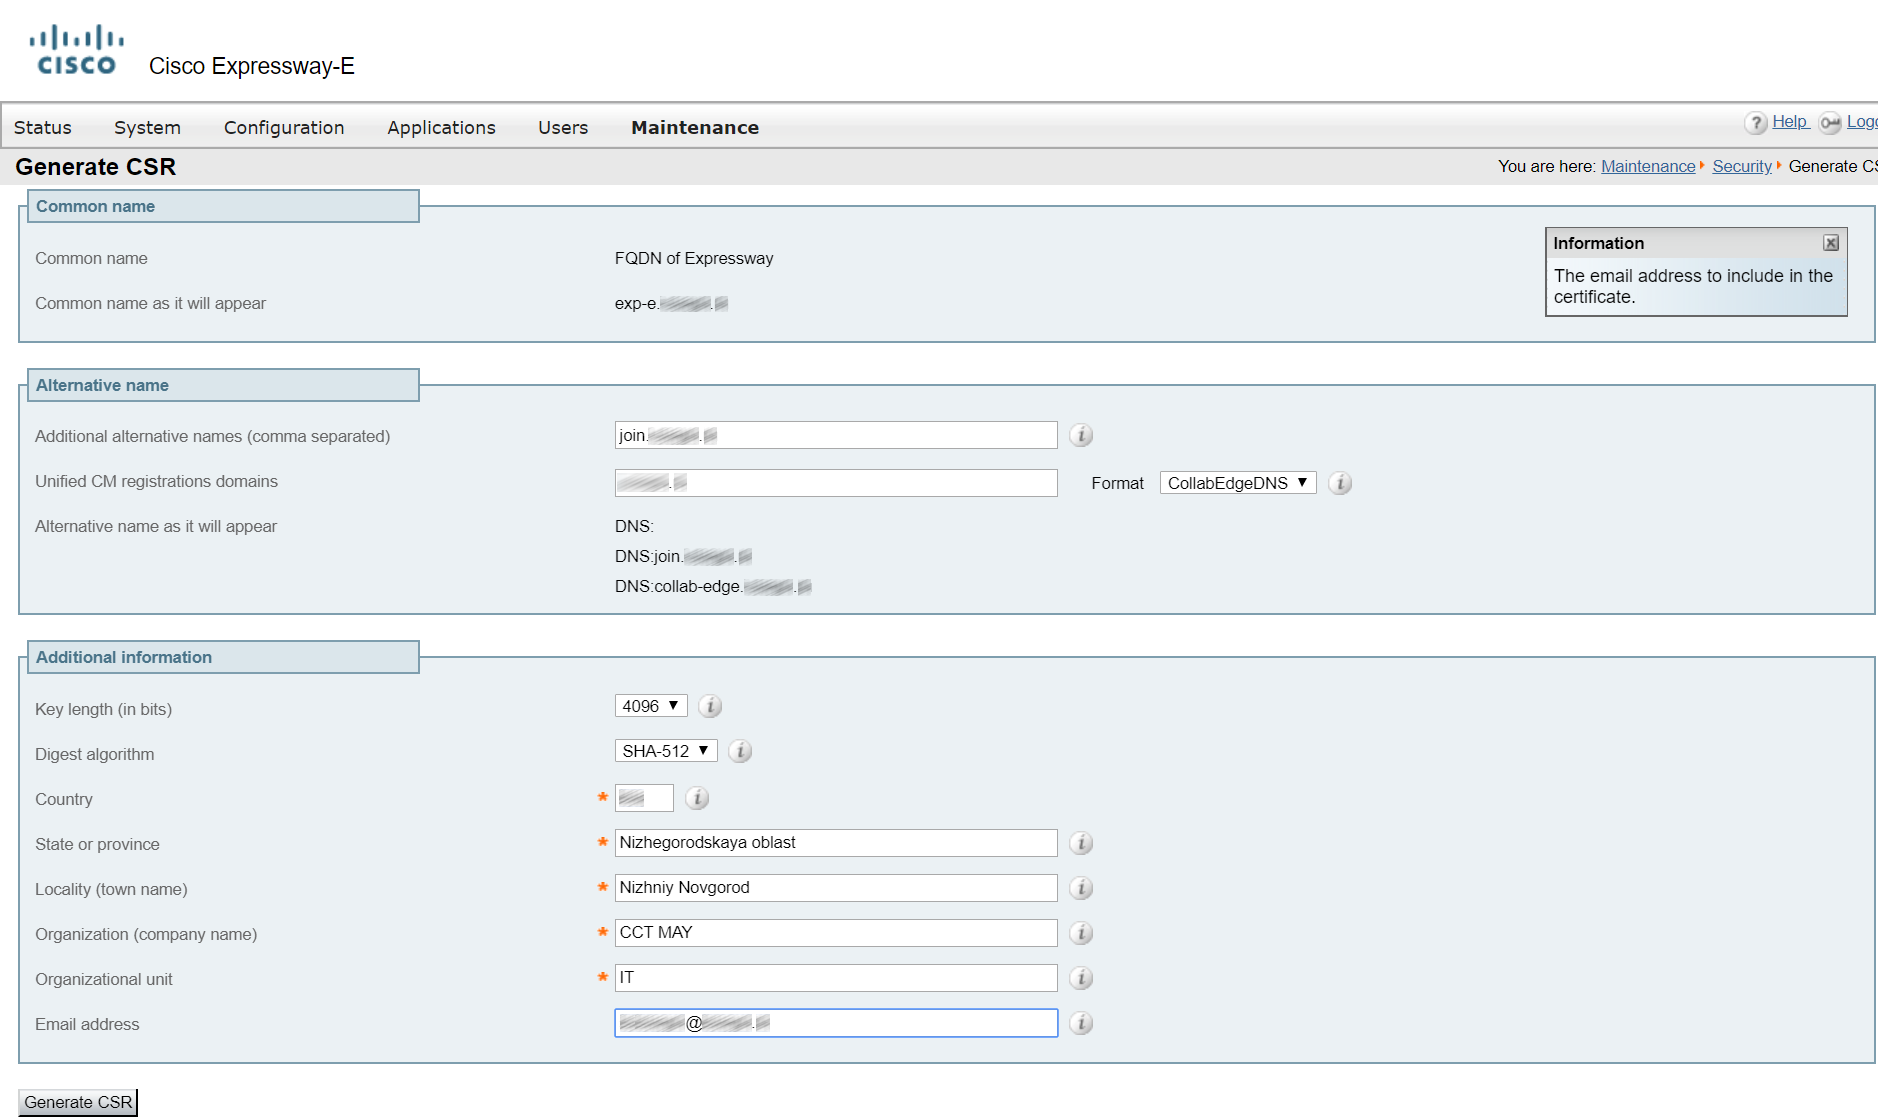
Without example.com or collab-edge.example.com, Cisco Jabber clients will give you ‘unreliable certificate’ warnings.
- Click Deploy Pending Cert.
- If everything has been done correctly, it should look like this.
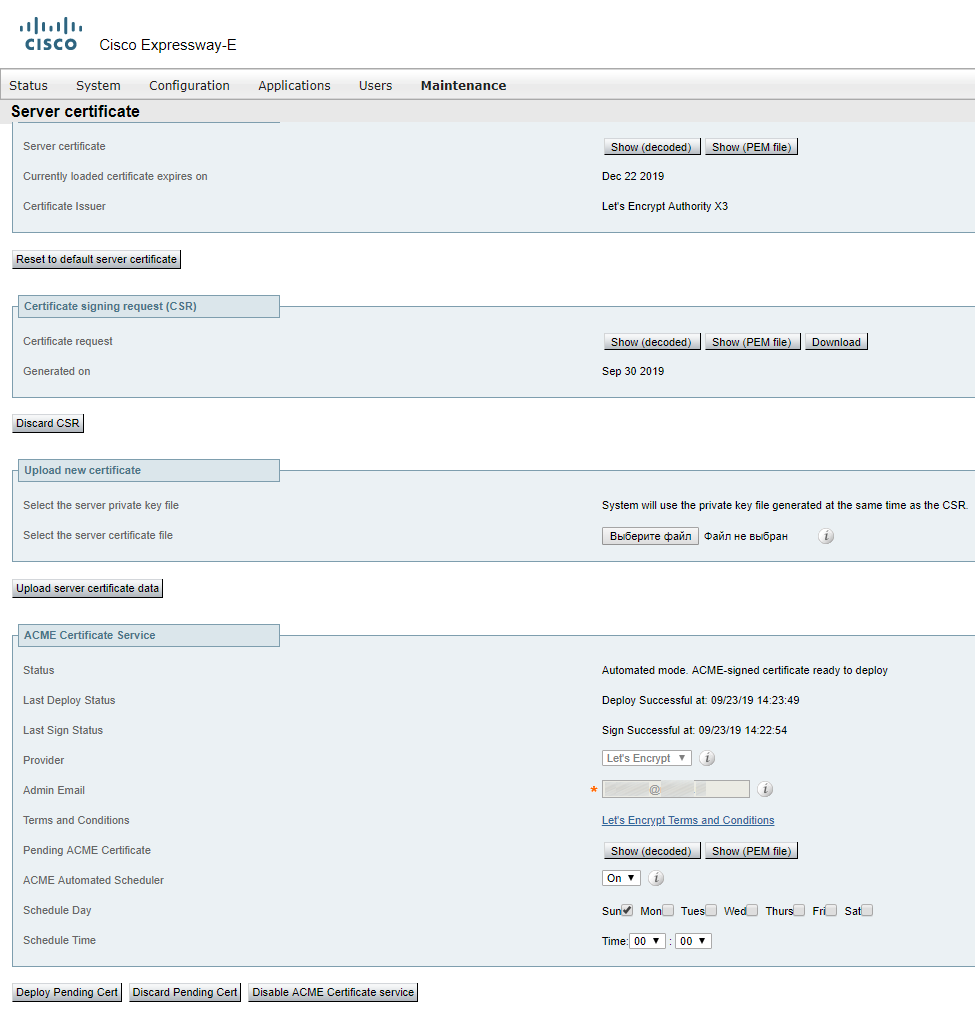
Note: in version 12.5.6, there’s a BUG concerning this matter. Versions 12.5.7 and 12.5.8 have been retracted due to security problems, so please upgrade to 12.5.9.
Zones
A zone is an abstract set of anything (domains, IP addresses, devices, services) with a certain set of rules. You can use zones to configure bandwidth, call routing and authentication, and apply these settings to everything within a zone. When you create Dial plans, you select zones the call should be passed to/from (instead of selecting domains).
There are several types of zones.
- Neighbor — a zone for connectivity with CMS, CUCM or other Expressway-C.
- Localzone — a zone including devices registered to Expressways.
- ENUM — for E.164 requests.
- DNS — for DNS requests.
- Webex — for scenarios with calls being passed from a corporate network to the Internet and then to a cloud. Similarly, calls from a Webex meeting are routed through the Internet and passed to the local routing system.
- Traversal (Client, Server) — for firewall traversal during call routing between Expressway-C and Expressway-E.
- UC Traversal — for Jabber with all its features to be reachable from the Internet.
- Default — whatever doesn’t belong to any other zone, falls here and works according to Default zone rules (if you have no rules, everything will be rejected).
So, let’s proceed to Expressway-C and create Neighbor zones for CUCM and Cisco Meeting Server.
Zones for CUCM
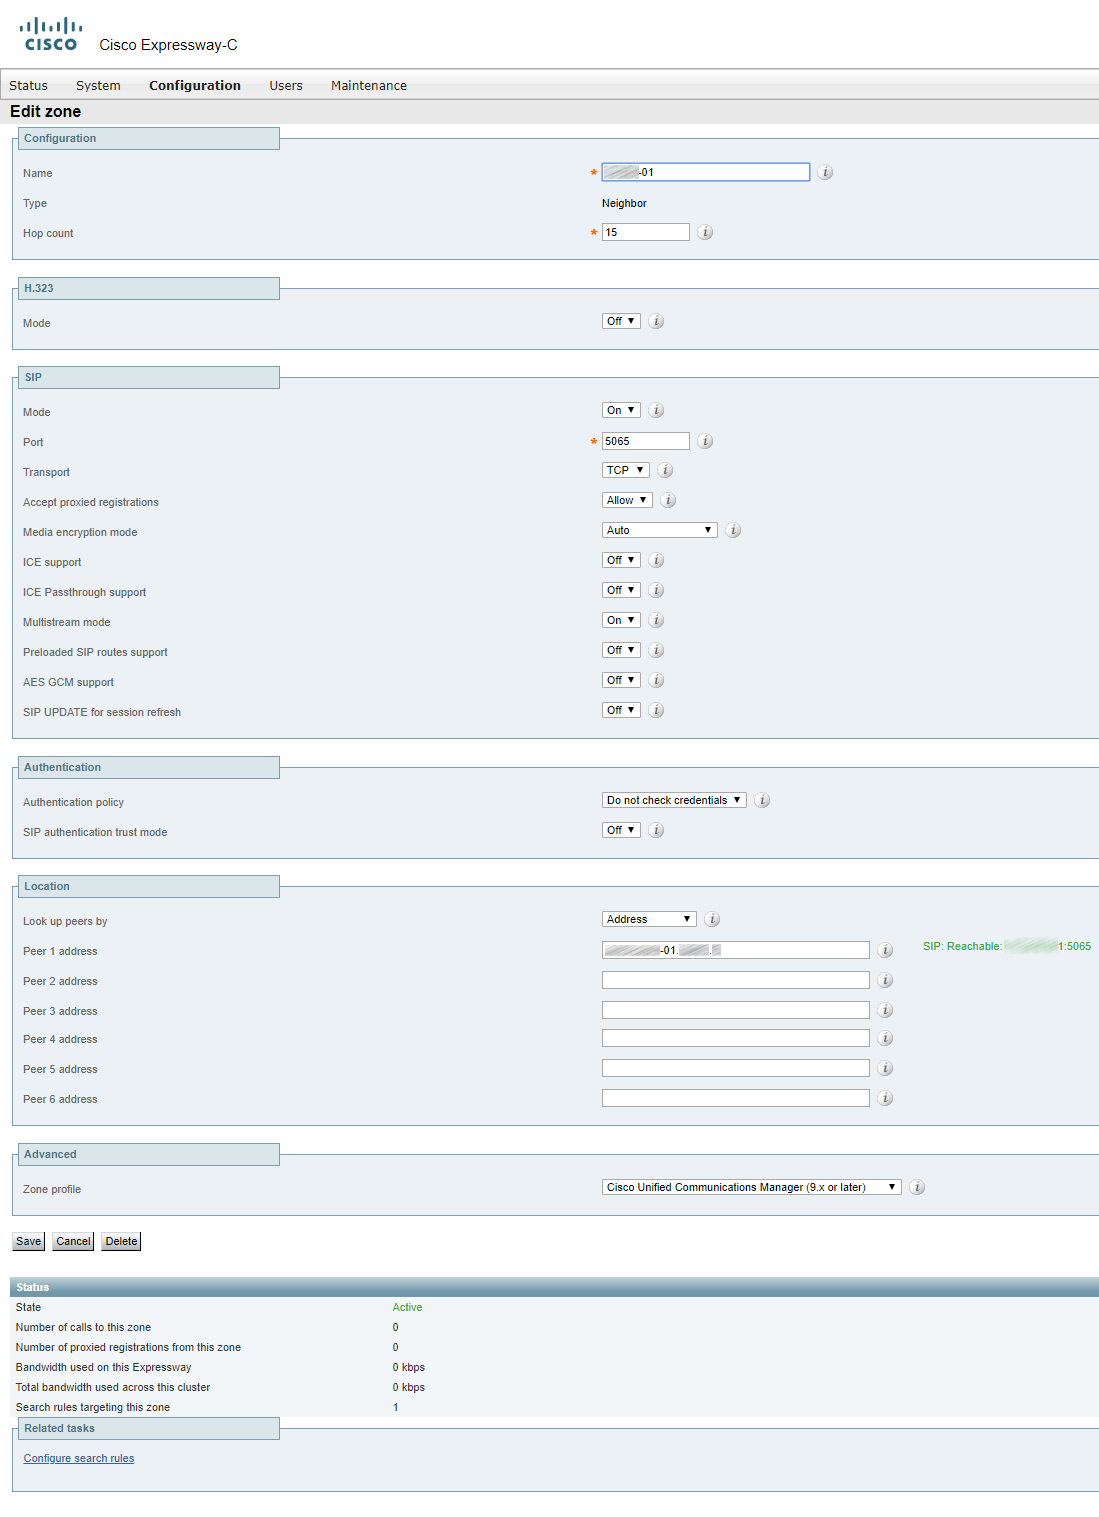
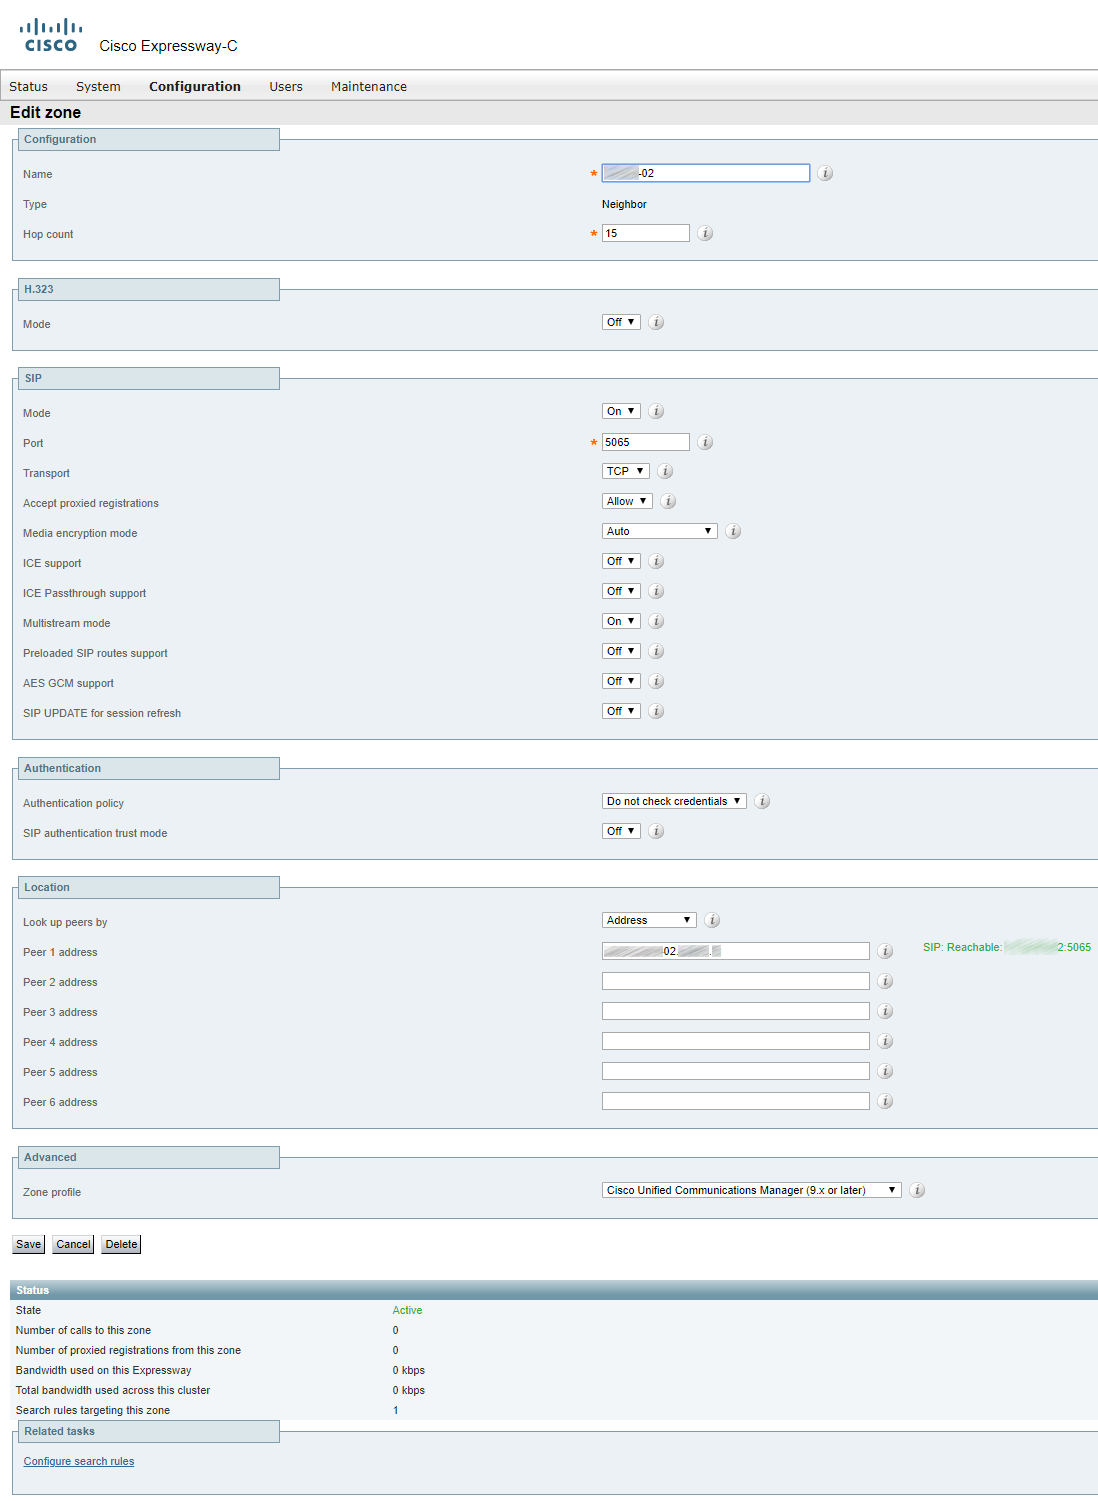
There should be a separate zone for each of CUCM servers in publisher and subscriber cluster(s). If you create a single zone and specify all servers in address fields, then only one in N calls will pass, with N standing for the number of servers in the CUCM cluster. Same for CMS.
In our case, there are only two servers.
The first zone:
The second zone:
You should also create a SIP Trunk Security Profile and a Trunk from CUCM to Expressway.
SIP Trunk Security Profile

Please note that you should set the incoming port to 5065, or it won’t work.
Trunk
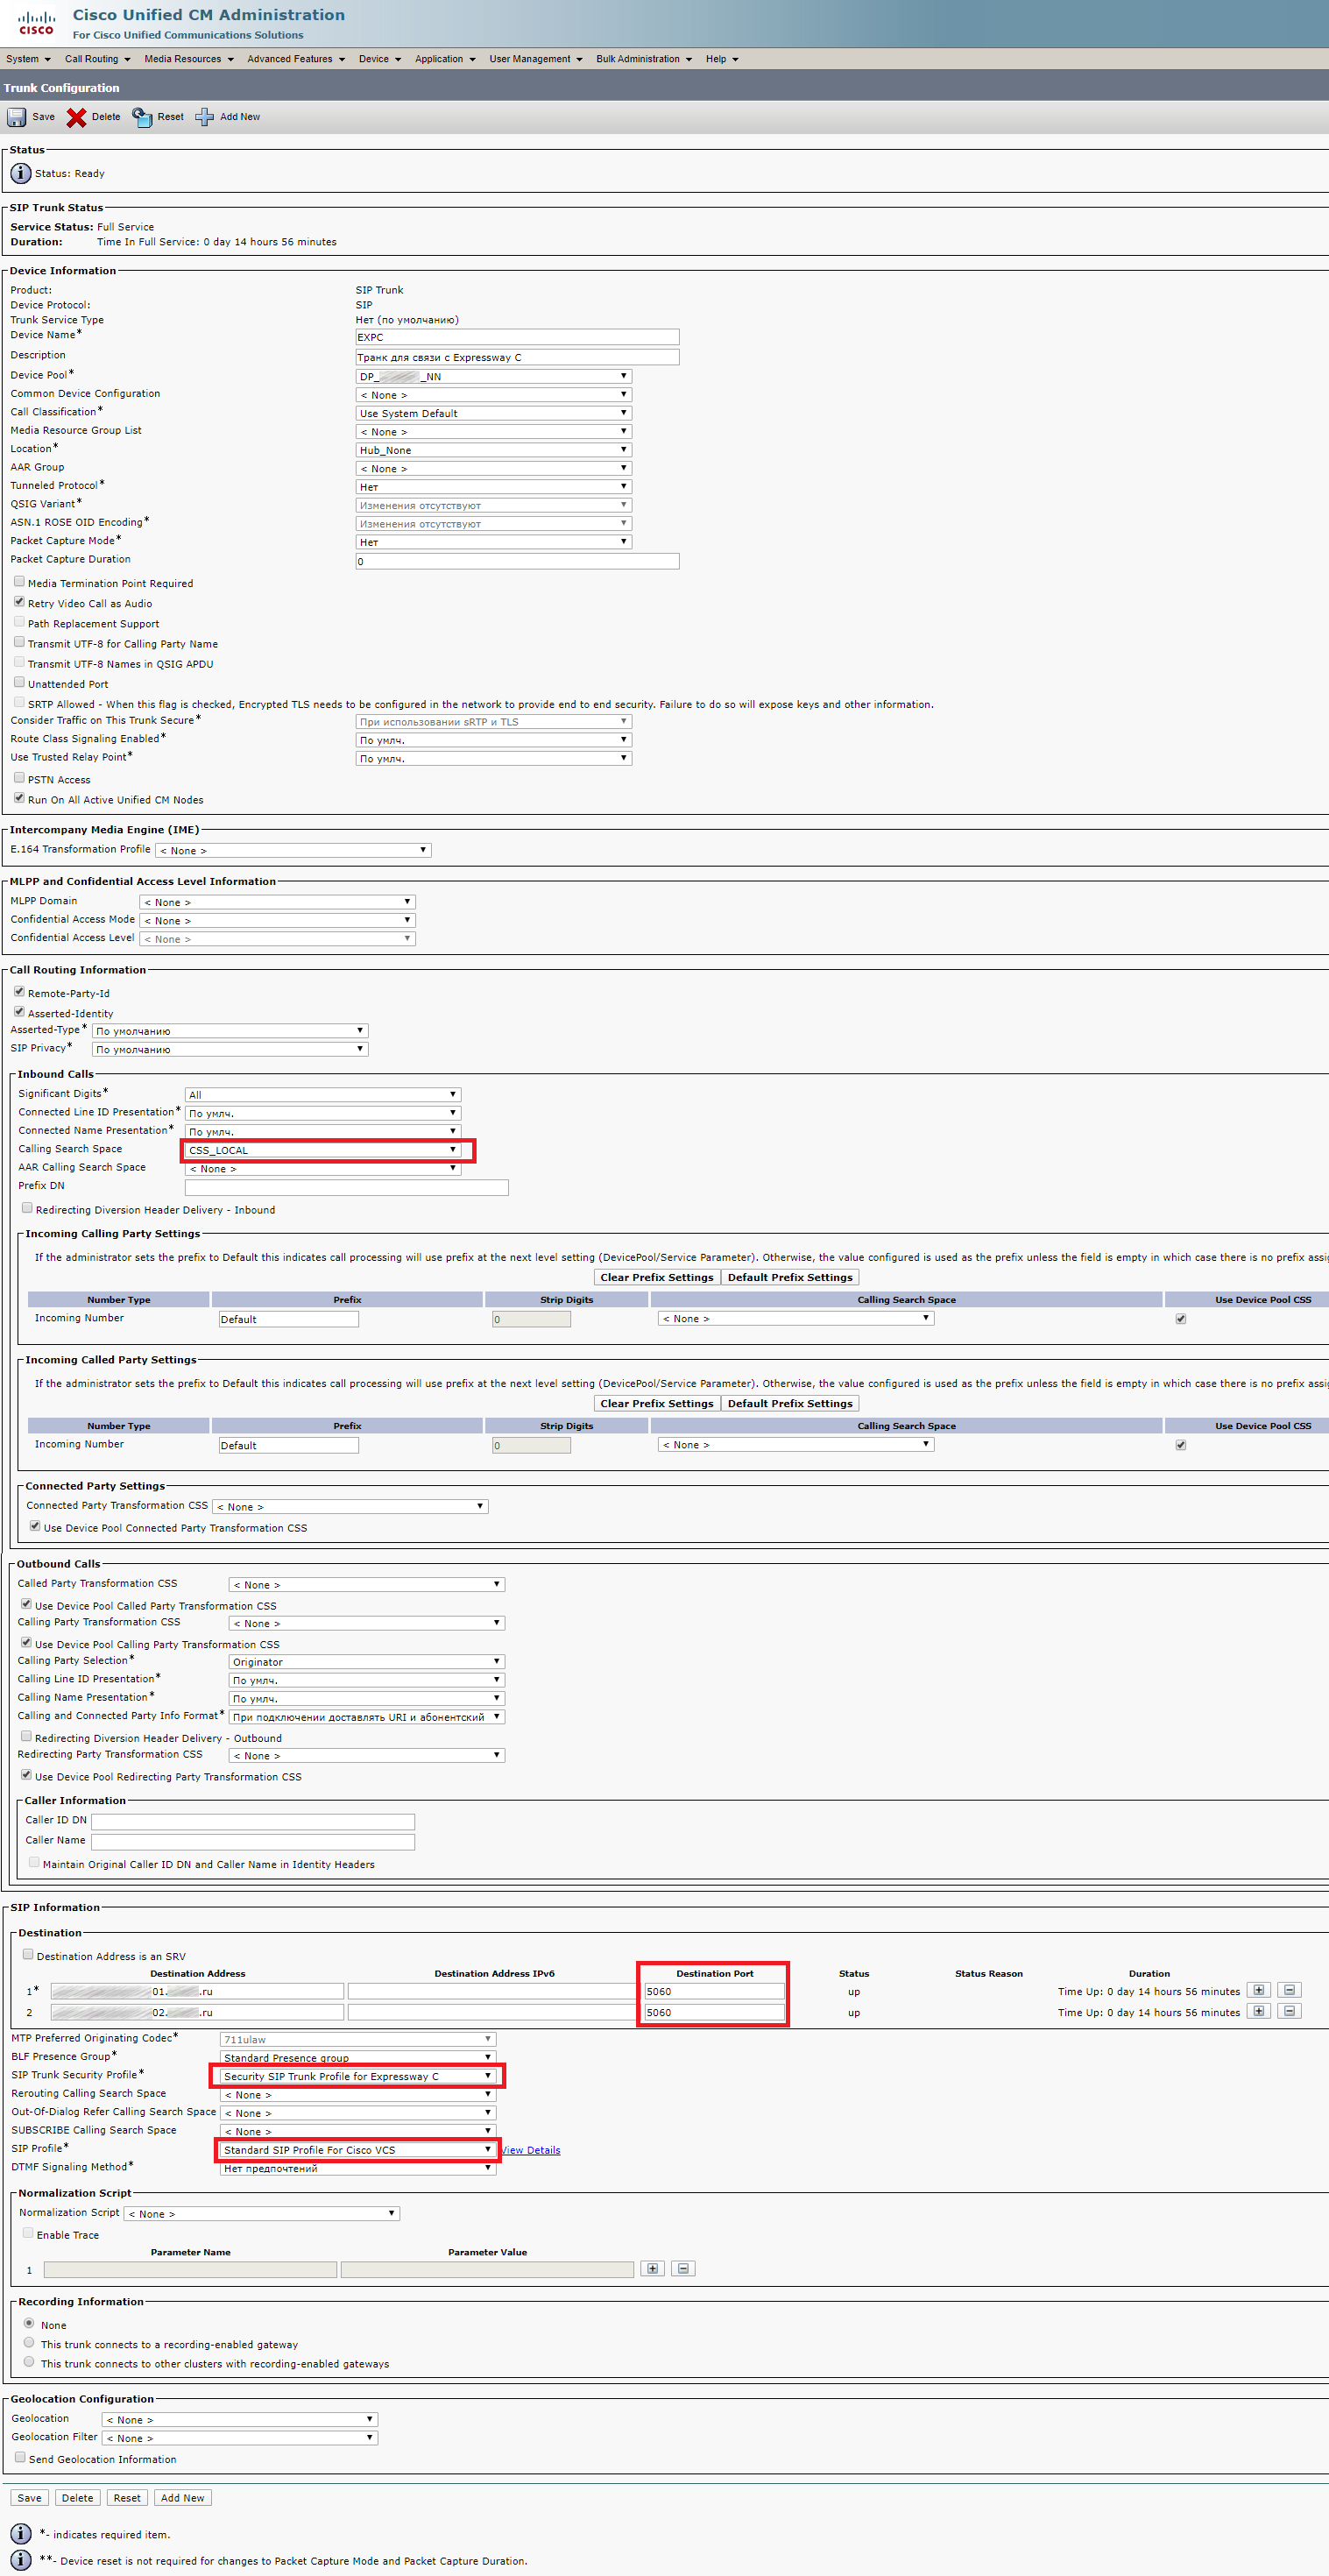
Now you should set the port number to 5060. If you use 5065, it will work, but the trunk’s status won’t change to Full Services and will always stay Unknown. You should also specify the correct CSS (depending on your configuration), and set the previously created SIP Trunk Security Profile and Standard SIP Profile for Cisco VCS as SIP Profiles.
Zones for CMS
If it’s just a single server and not a cluster, you can leave the Zone Profile Default.
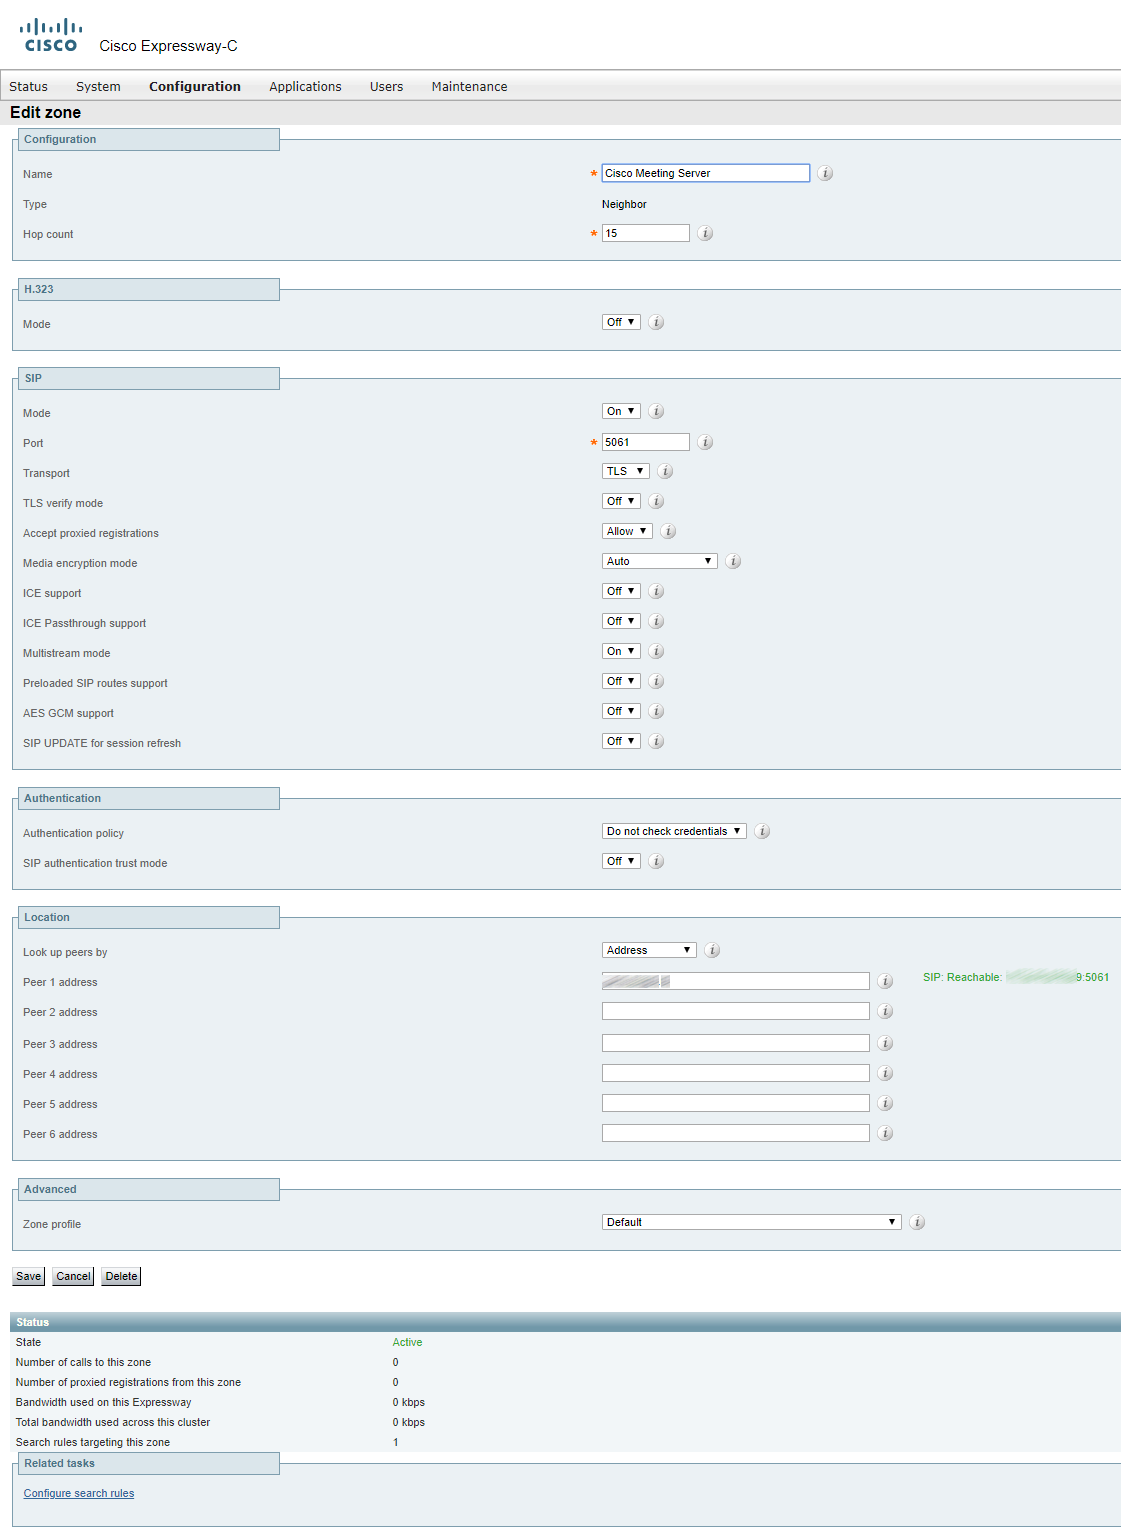
If you have a cluster, you should fill the address fields with FQDNs of all clustered servers and set Meeting Server load balancing to ON.
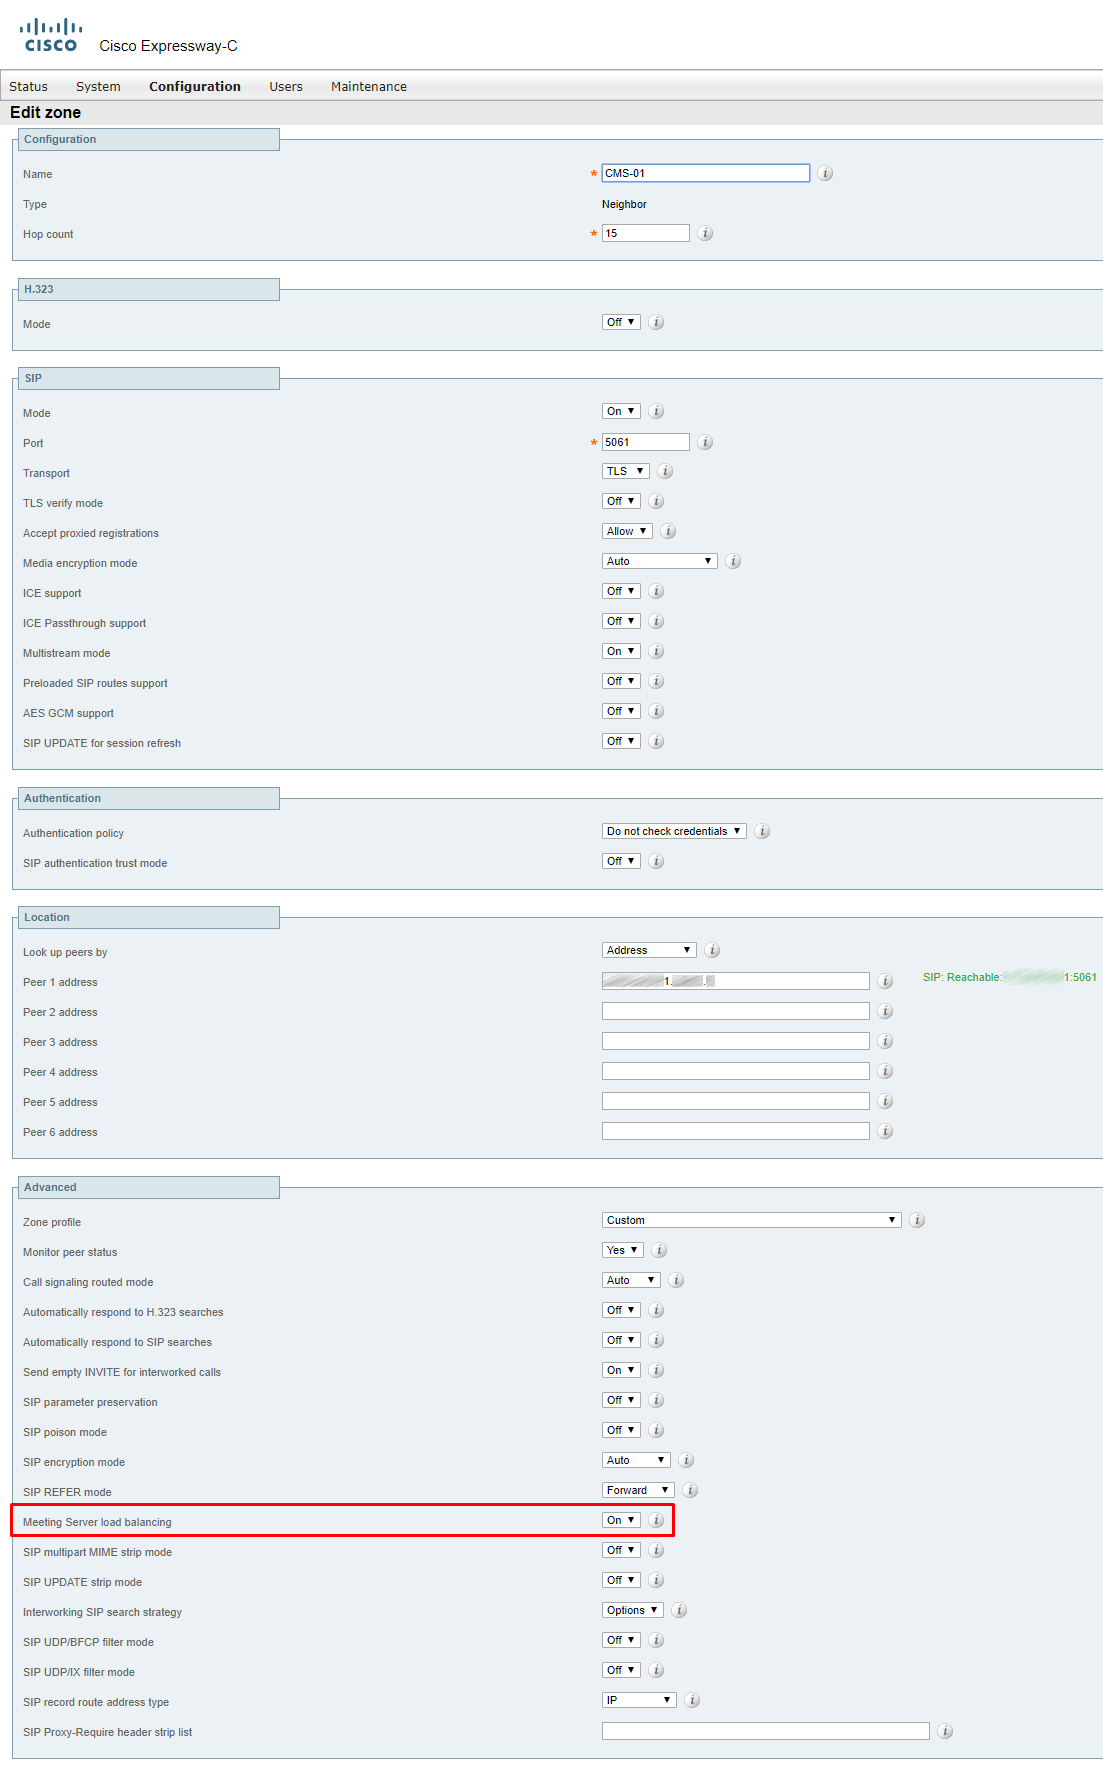
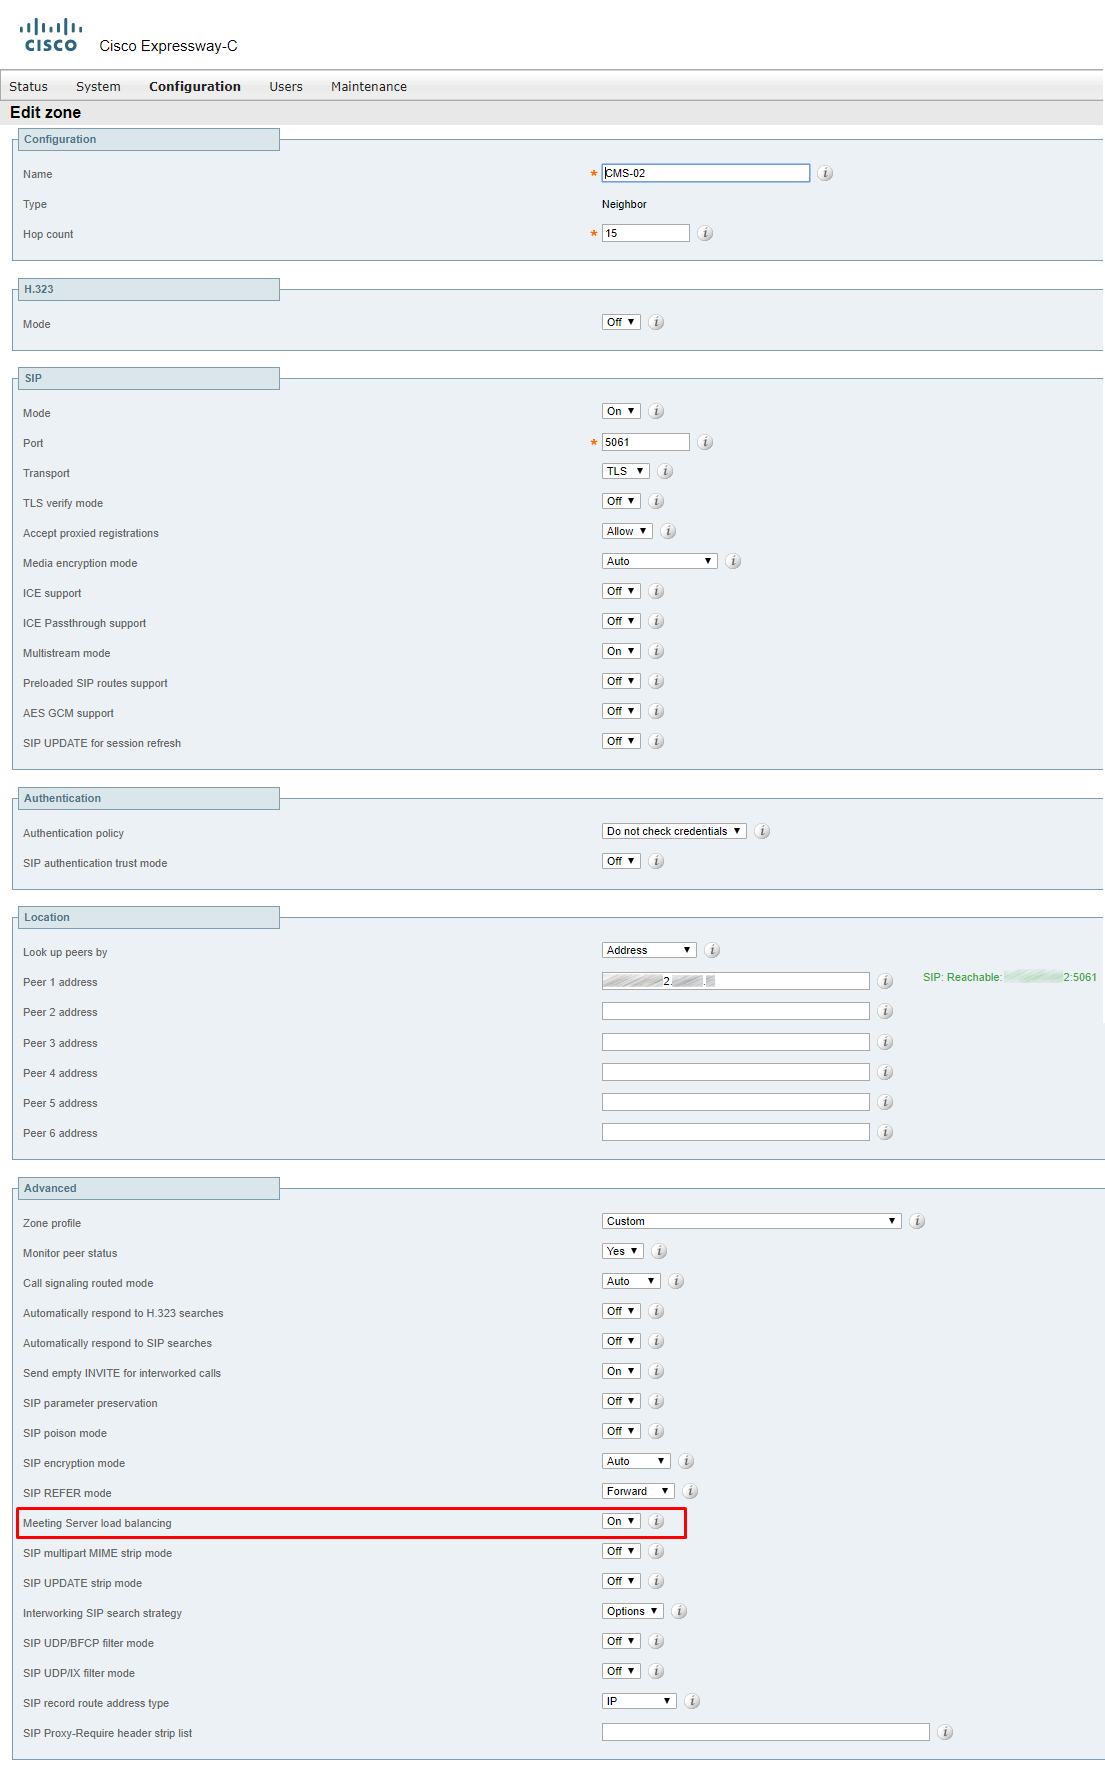
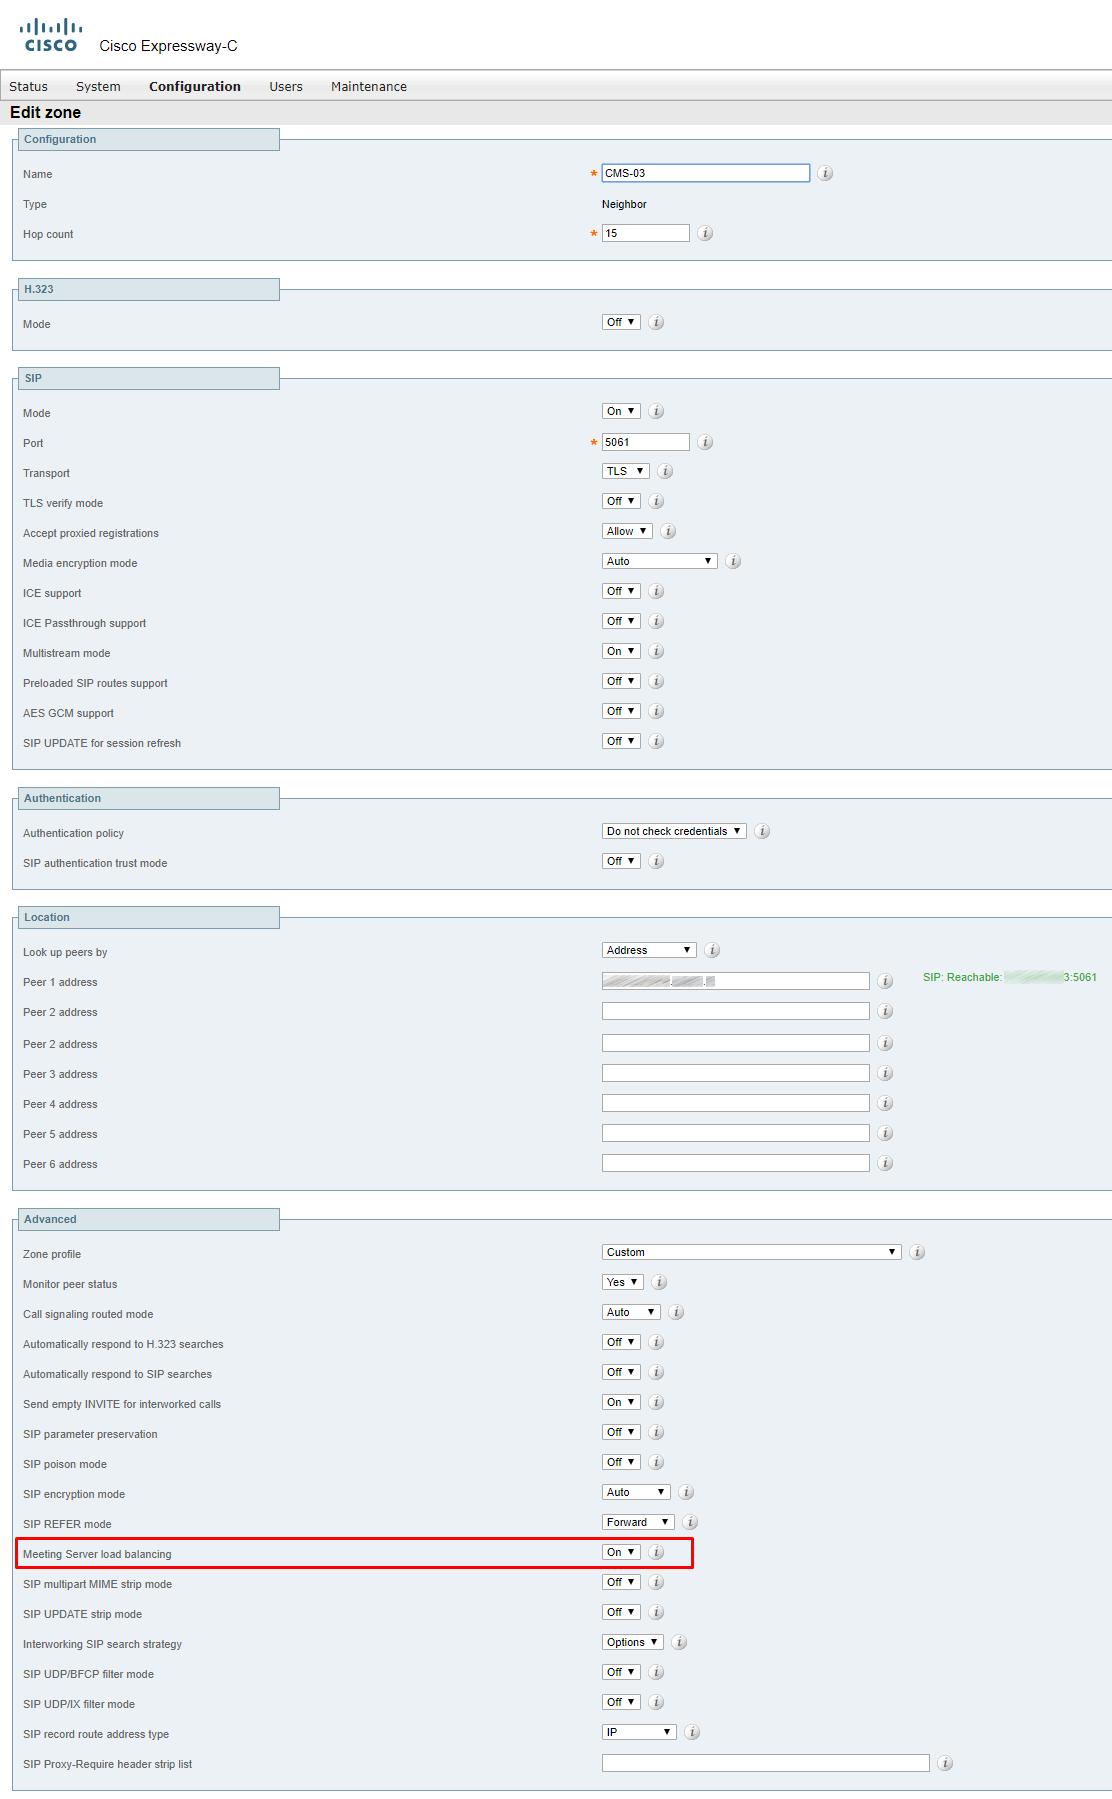
UC Traversal Zone (Expressway-C)
In our case, H.323 protocols are not used, so we create a UC Traversal Zone, not just Traversal.
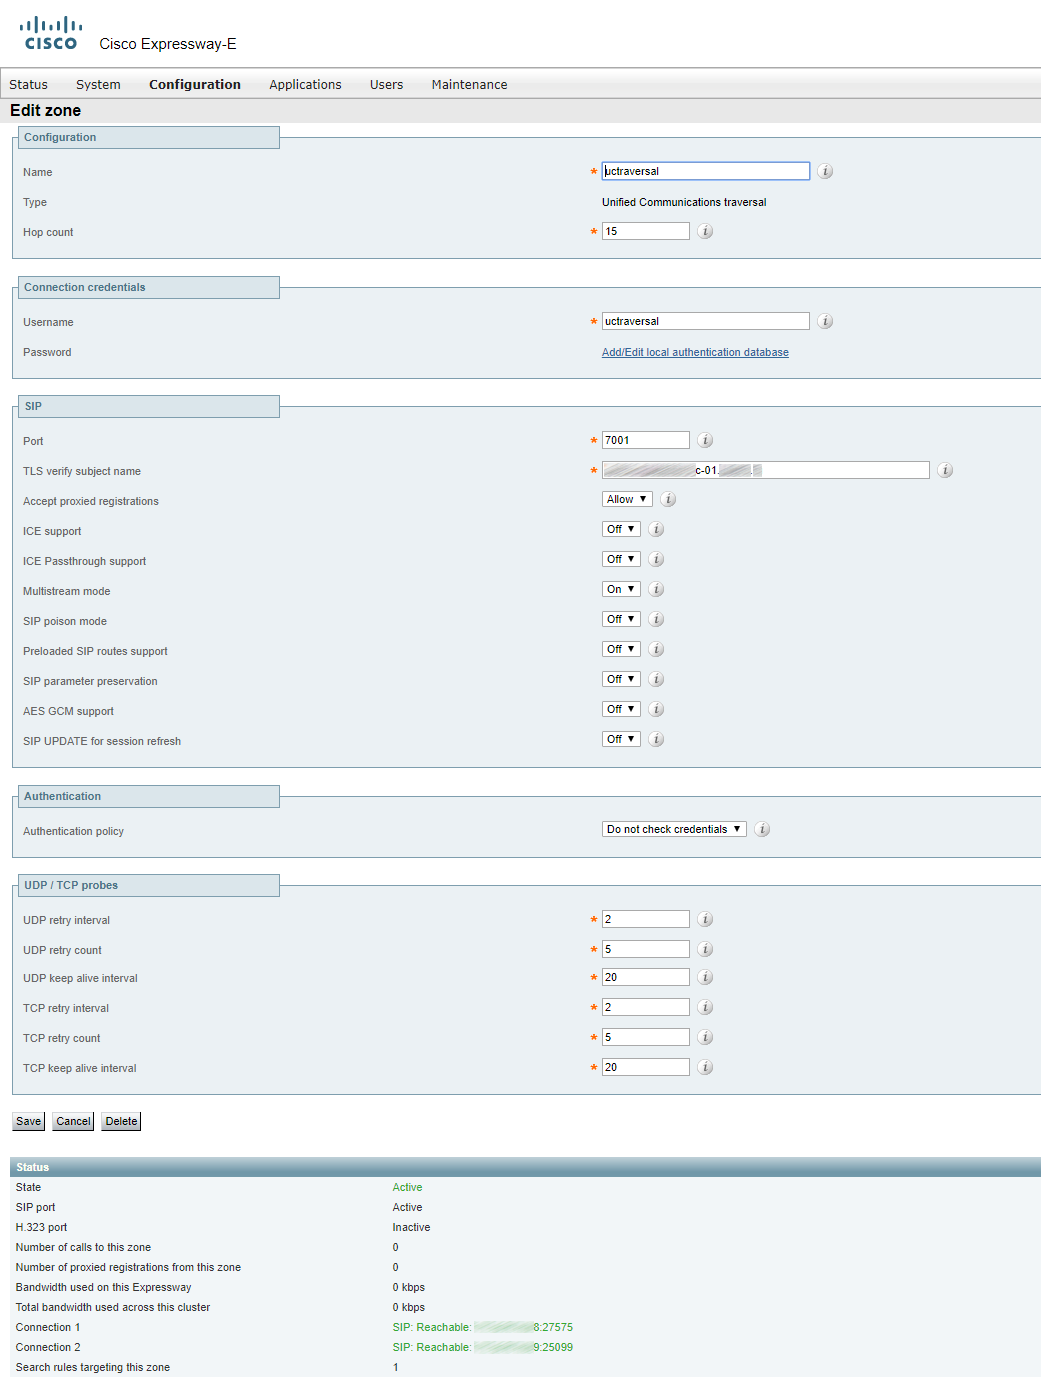
On Expressway-C, configure a client connection in UC Traversal zone. In relation to traversal tunnel between Expressway-C and Expressway-E, Expressway-C is a client. It establishes a tunnel from local network to Expressway-E (which is in DMZ), so that signaling can be passed through the corporate firewall in both ways. That’s why we should enter the login/password that will be created on Expressway-E (where we configure the server part of UC Traversal zone).

Now, on Expressway-C, it should look like this:
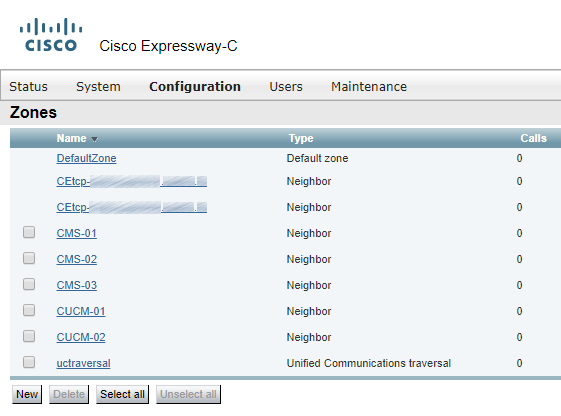
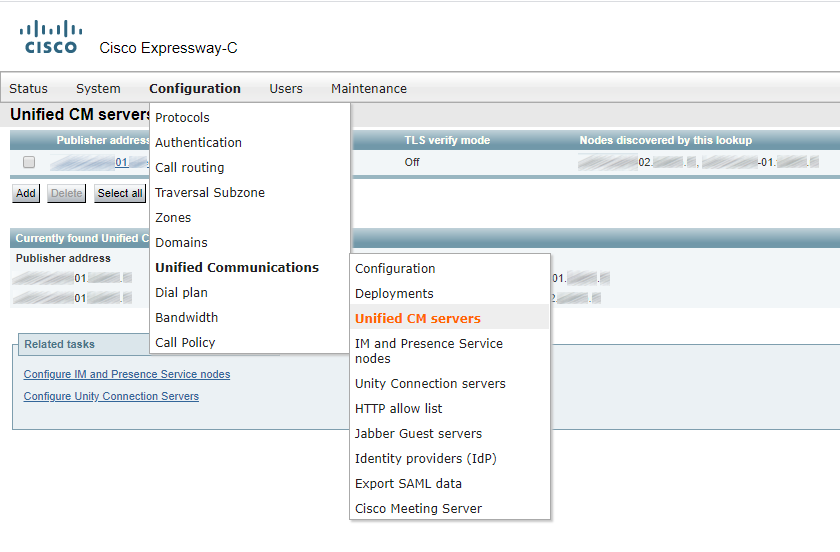
Neighbor zones (and rules for that zones) CEtcp… will be created automatically if you explicitly set a CUCM in Expressway-C (Configuration > Unified Communications > Unified CM servers).
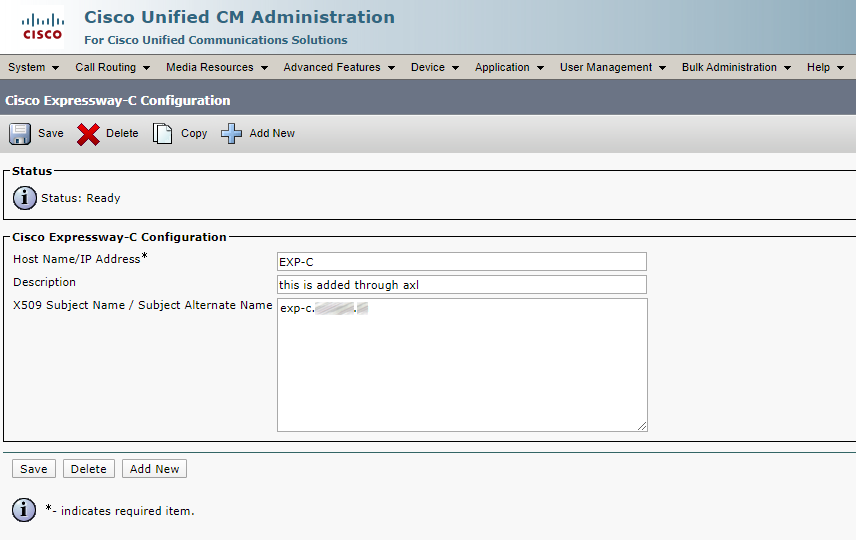
In CUCM 12.5, an Expressway will be created automatically as well.

UC Traversal Zone (Expressway-E)
Usually, Expressway-E is located in the DMZ and has an interface that is accessible from the Internet (sometimes this interface address is behind NAT). Most firewall policies don’t allow incoming connections from the DMZ to the local network. However, most firewall policies allow outgoing connections from the local network to the DMZ and the Internet. Expressway-E is configured as a traversal server, being able to accept connections from firewall traversal clients (such as Expressway-C) which are inside the local network. These connections are used for two-way communication between Expressway-E and Expressway-C.
On Expressway-E, you should create a user for the traversal connection. Let’s call it uctraversal.


Configure the UC Traversal Zone.
DNS Zone
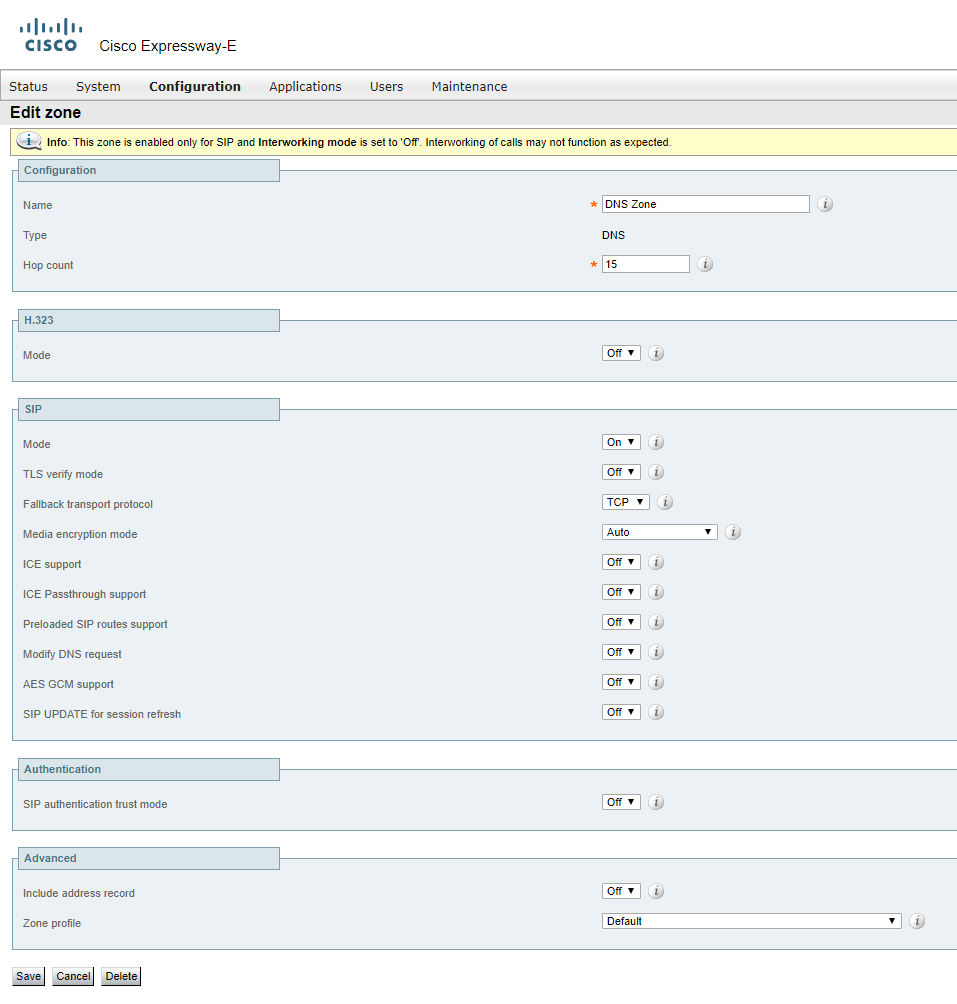
First of all, DNS Zone is for searching DNS SRV records in order to find the destination for a called domain. For SIP, it looks for _sips._tcp. domain and/or _sip.tcp. domain, depending on encryption and security settings. You can configure Expressway to perform standard A record requests, too, in order to find a call's destination if a search for SRV records fails. Such calls make it possible for Expressway to route calls to destinations that aren’t defined explicitly. You can simply register the corresponding DNS SRV records in a public DNS server, and then get calls from external clients automatically and/or call them if they have performed the same action. That’s called open federation or Business-to-Business (B2B) calls.
In the next part of this article, we’ll talk about TURN configuration and Business to Business (B2B) calls.
Read also:
- Part 1 - Cisco Expressway 12.5.5. Remote Videoconferencing without VPN
- Part 2 - Cisco Expressway 12.5.5. Remote Videoconferencing without VPN
- Part 3 - Cisco Expressway 12.5.5. Remote Videoconferencing without VPN
Lets talk.


