 Integrating CUCM and Active Directory can make administration much easier. Correct configuration may help you to automate new phone registration in the future.
This article will help you to get the most out of using CUCM in a bundle with AD.
First of all, you should activate the Cisco DirSync service.
Proceed to Cisco Unified Serviceability > Tools > Service Activation > Directory Services > Cisco DirSync

Enable synchronizing from a LDAP server.
Cisco Unified CM Administration > System > LDAP > LDAP System
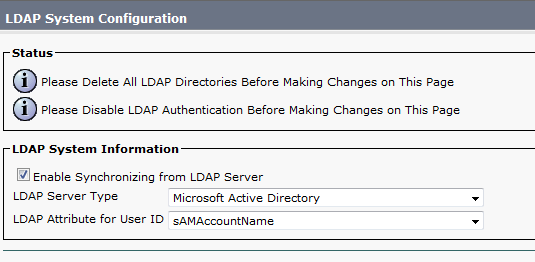
Now you should configure integration with a specific LDAP directory. Let's look into this stage.
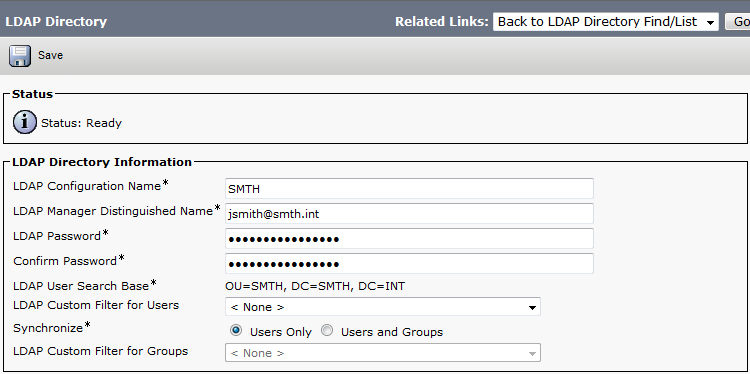
LDAP Configuration Name – a name of your choosing.
LDAP Manager Distinguished Name – an Active Directory user's name. It's recommended to create a separate user account for CUCM. The user account must have read access.
LDAP User Search Base – a user search base. In this case, the search will be performed in SMTH organizational unit in smth.int domain.
Mapping the standard fields:

We recommend you to map Directory URI to mail attribute. It will help you to avoid some problems while configuring XMPP Federation through Expressway later.
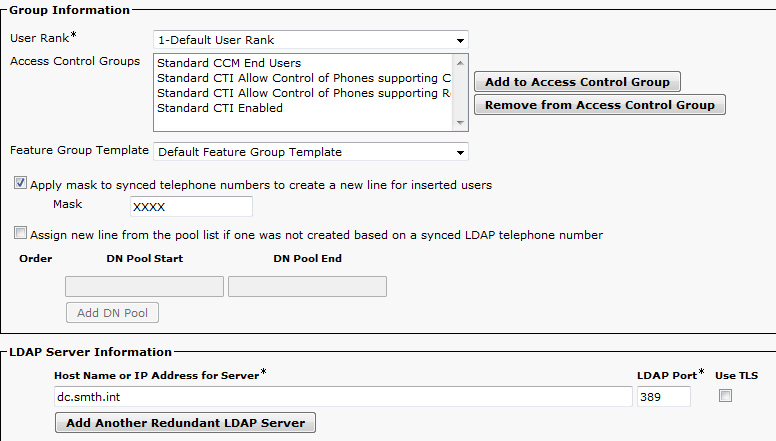
Access Control Group – a list of groups an imported user will be automatically added to.
Feature Group Template – a set of additional features to be enabled for a user, for example, IM & Presence, Conference Now and some user parameters.
The template itself can be configured here: Cisco Unified CM Administration > User Management > User/Phone Add > Feature Group Template

Apply mask to synced telephone numbers to create a new line for inserted users – a mask for automated DN creation for imported users. The information will be obtained from the Phone Number field.
LDAP Server Information – a server to synchronize with. It's recommended to add several servers, because when LDAP Authentication is on, all users’ authorization requests are redirected to AD. So if the server is down, the users won't be able to authorize.
When the configuration is over, click Perform Full Sync Now.
Now you can see your users listed here: Cisco Unified CM Administration > User Management > End users.

And the automatically created DNs should be here: Cisco Unified CM Administration > Call Routing > Directory Number.
The users are already configured according to your settings.
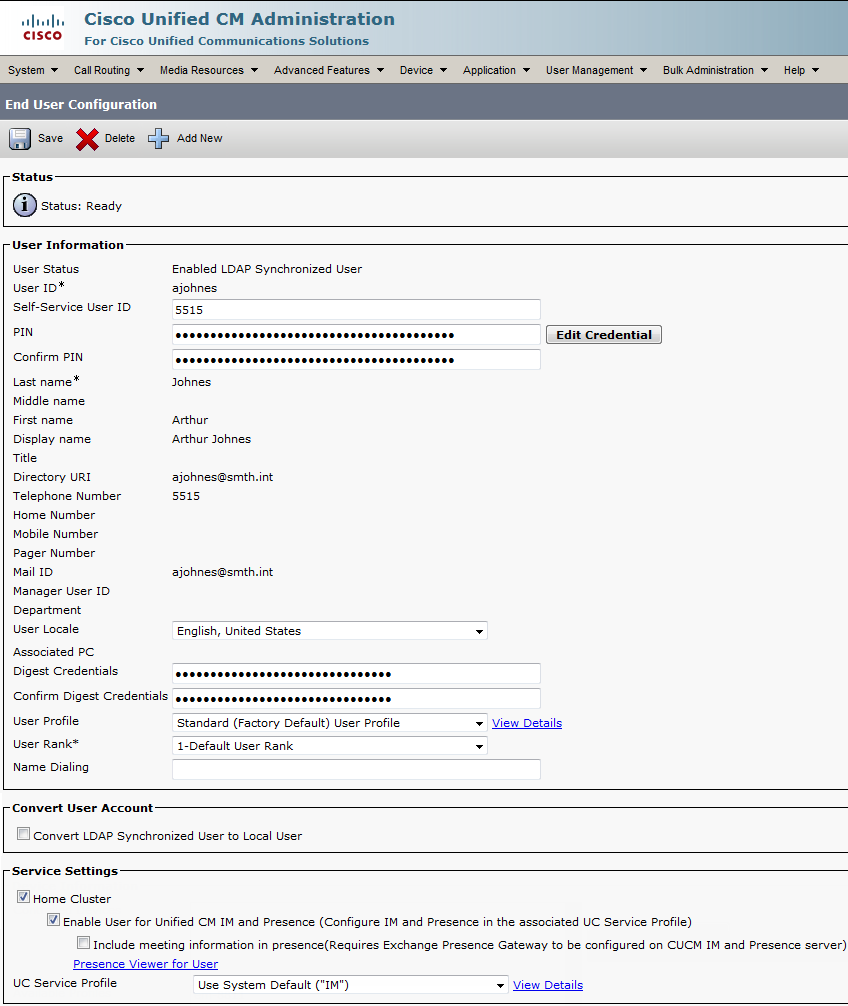
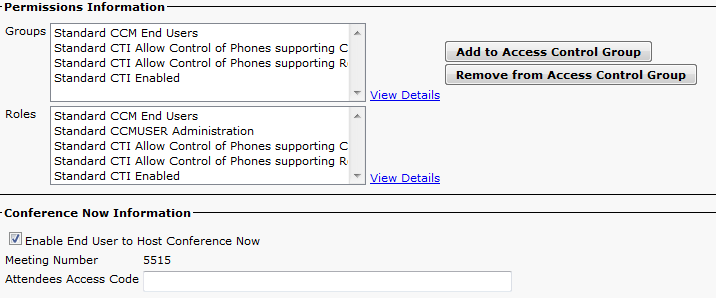
The users have been created. All you need to do now is configure authentication through Active Directory.
Cisco Unified CM Administration > System > LDAP > LDAP Authentication
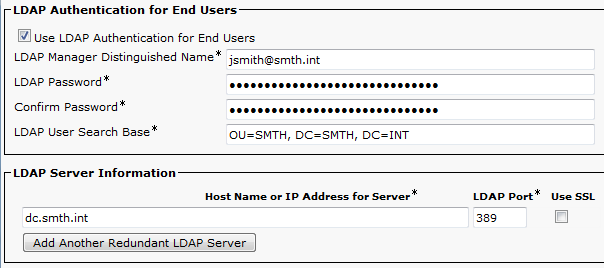
Now you can proceed to Auto-Registration and Self-Provisioning settings.
Lets talk.


