 If we have Cisco IM and Presence server and Cisco UCM in our corporate environment, as well as unhandy wi-fi Cisco 7925 telephones, which are heavy and consume the battery as fast as a Formula One car, then sooner or later we’ll think about switching to Cisco Jabber on a mobile phone.
This article tells what you need for that.
Before all experiments, make sure you have the following things:
- Cisco Unified Communications Manager 8.6.2 or higher (preferably the latest version)
- Cisco IM and Presence (integrated with CUCM, of course)
- Wi-Fi Wireless Access Point, already set up by an administrator to distribute wireless internet (don’t mix it up with Wi-Fi Router, since if you have Router, your phones will be hidden behind NAT and RTP streams and it will be complicated to route correctly)
- CUCM и IM&Presence Administrator kind enough to make us a CUCM and Presence user
- Android 4.x or higher, better and faster (iPhone will do as well)
You can discard Cisco IM and Presence and configure Cisco Jabber for CUCM phone services only. It will be a dull and sad client (as an alternative to Jabber: what can possibly prevent you from registering an Android phone as a SIP third-party device on CUCM?), but you’ll be able to call anyway.
Proceed to Google market (or Apple Store for iPhone)
https://play.google.com/store/apps/details?id=com.cisco.im
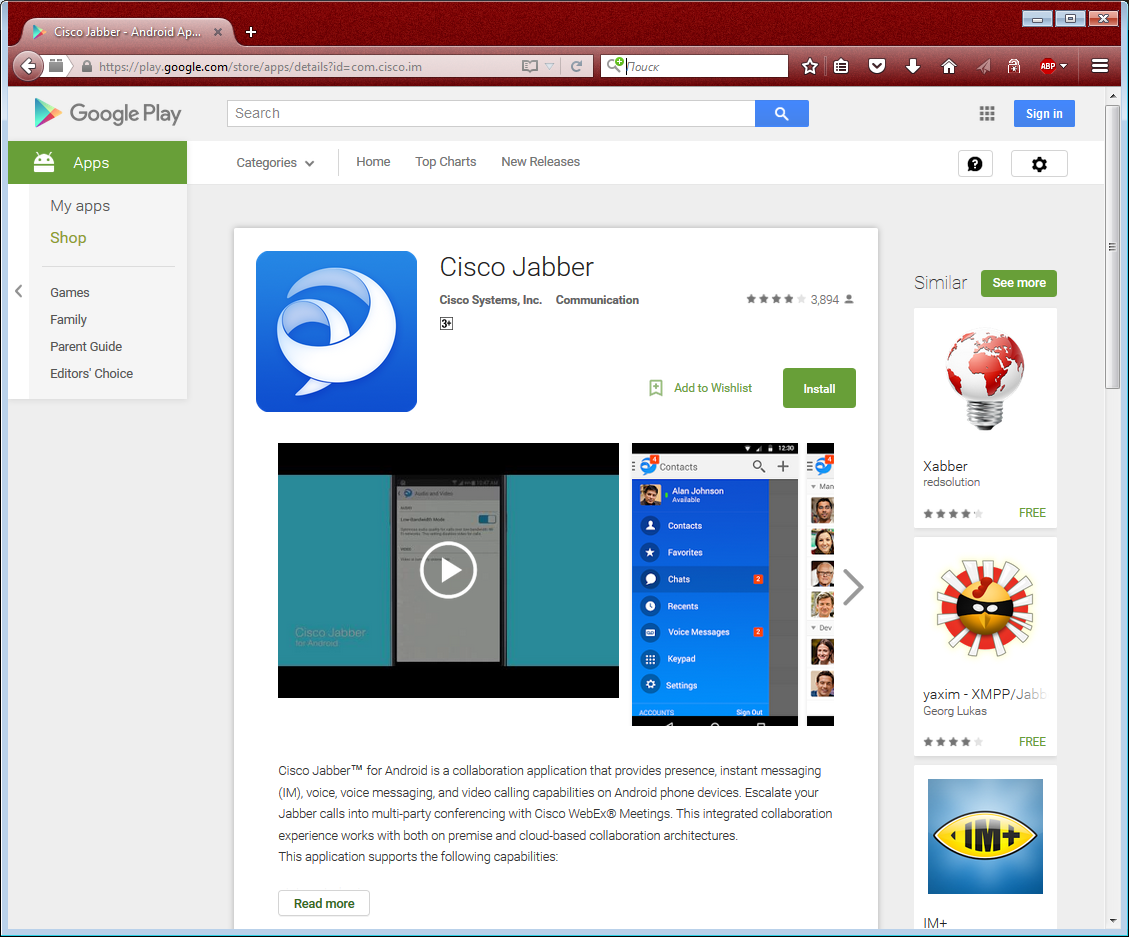
And install the app.
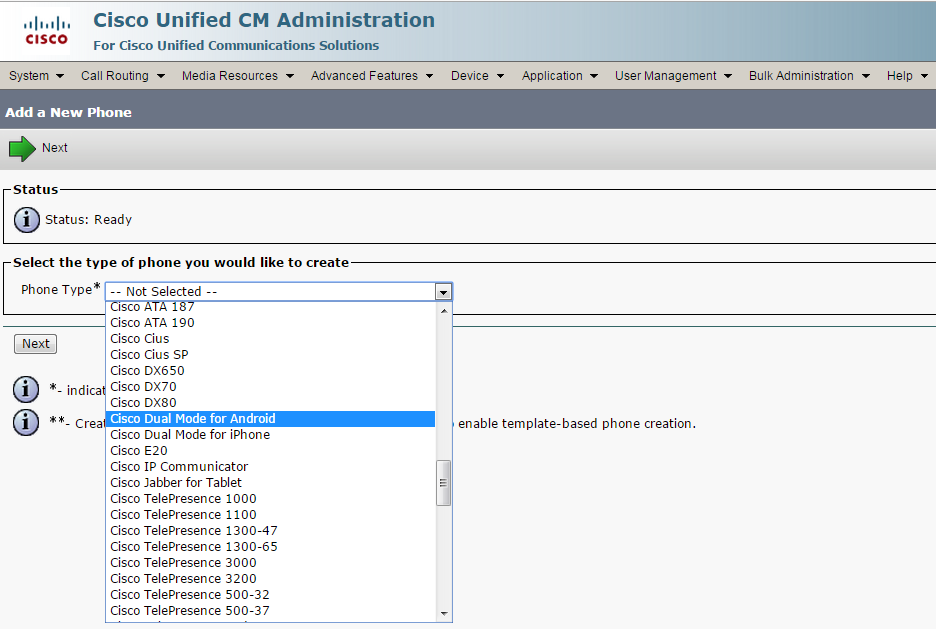
But we won’t be able to run it until we perform the configuration steps in our Unified Communication infrastructure. So, led by the craving for launching Cisco Jabber on our phone, we go to the CUCM web interface and add our device.
Use the menu: Device - Phone - Add new – select "Cisco Dual Mode for Android"
Now we configure our precious, paying attention to the following aspects:
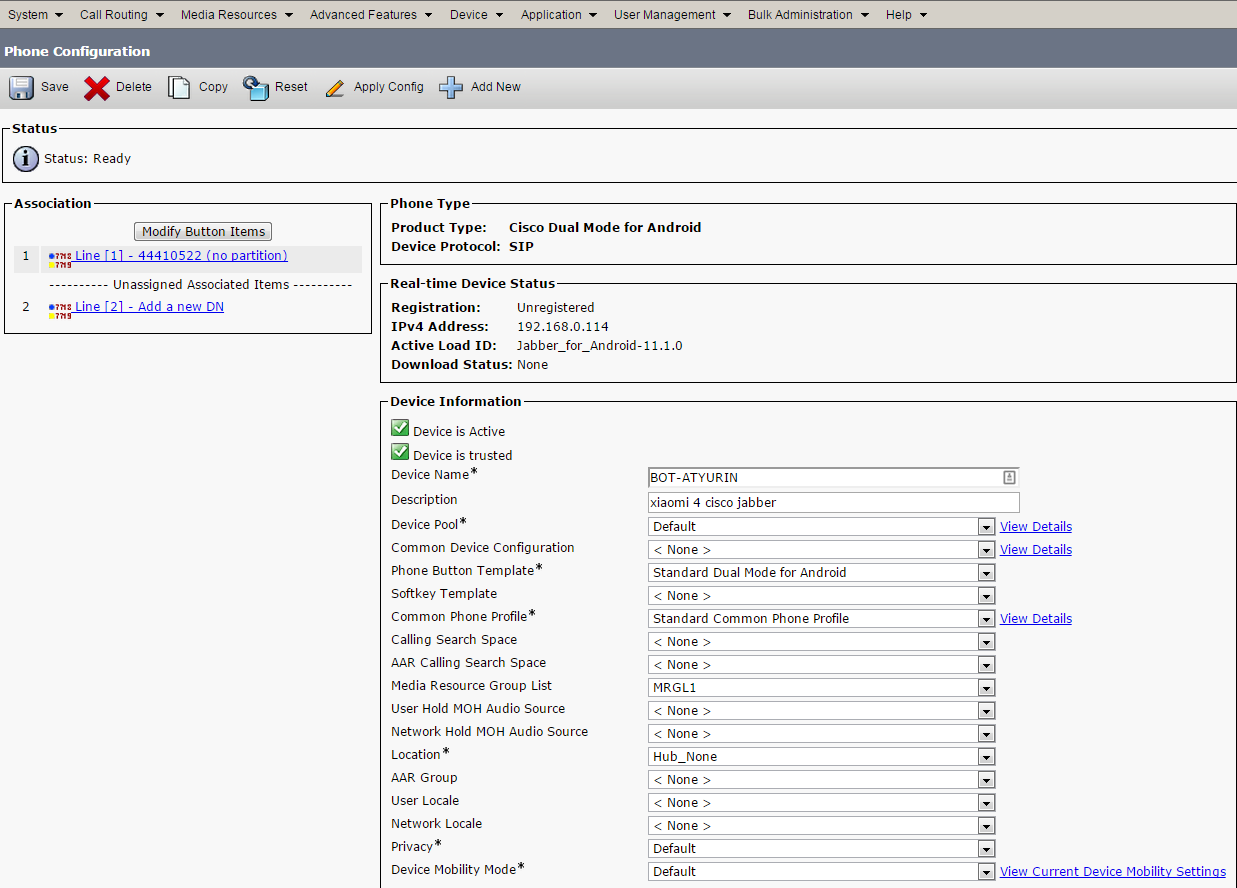
Device Name – in case of Android device it should start with BOT prefix (TCT in case of iPhone) and include name in upper case (BOT <NAME>). Allowed characters: a–z, A–Z, 0–9, (.), (_), (-). Total name length is limited to 12 characters. My device name is BOT-ATYRIN.
Description – specify or shyly conceal the phone model (or write any kind of nonsense)
Media Resource Group List – either specified explicitly or assigned through the Device Pool
Optionally specify User Hold MOH Audio Source и Network Hold MOH Audio Source
Owner – select User
Owner User ID – select yourself from the list of CUCM users
Device Security Profile – Cisco Dual Mode for Android – Standard SIP Non-Security Profile
SIP Profile – Standard SIP Profile for Mobile Device
If necessary, in Product Specific Configuration Layout section you can turn video support on, and specify a list of SSID Wi-Fi access point names, separated with ( /), if you wish to connect to the specified access points only.
After that we can add a line (DN) to our device.
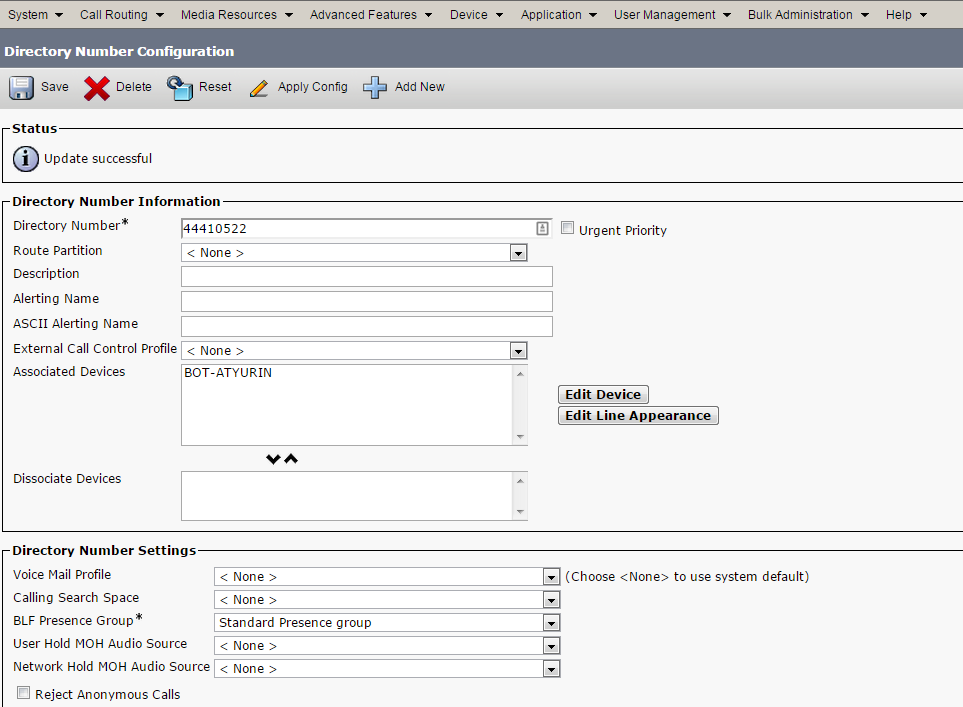
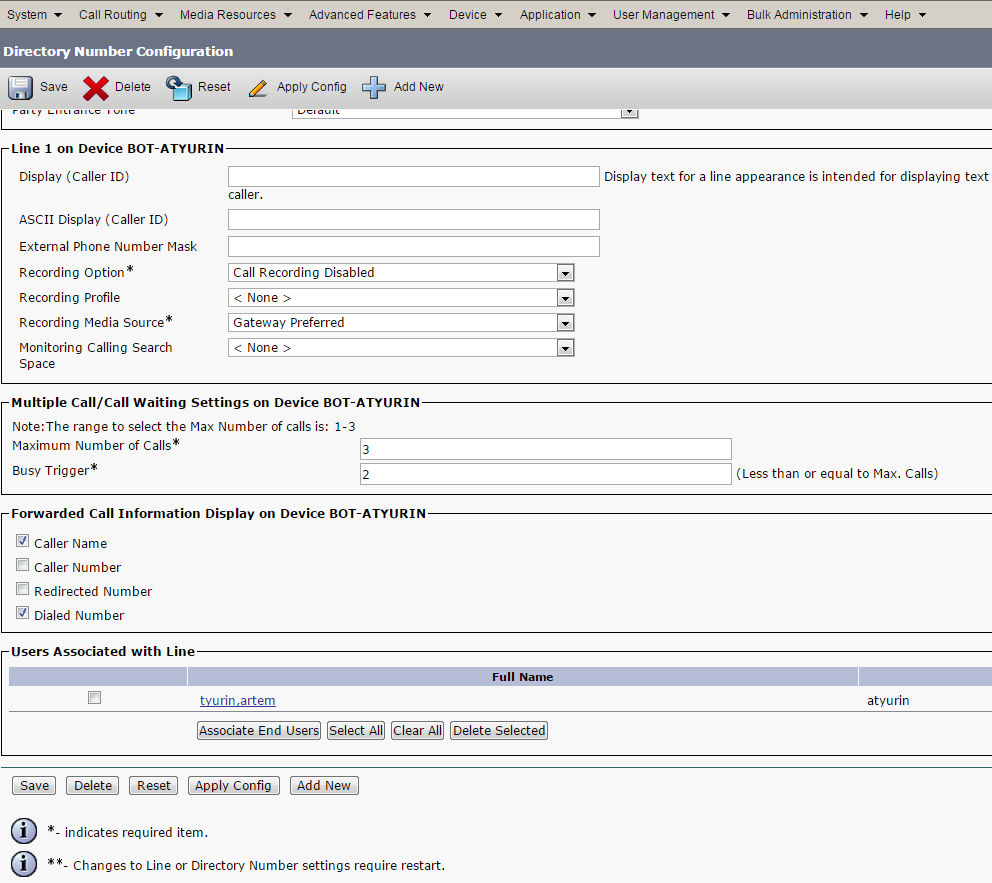
Associate yourself with this line.
Take notice that since Cisco Jabber 11.0.1 and CUCM 10.5(2)su2 versions you can use conversation recording and listening features!
Quoting the documentation: Silent Monitoring and Call Recording (Built-in Bridge) — In 11.0.1 Cisco Jabber for Android supports silent monitoring and call recording using Cisco Unified Communications Manager 10.5(2) su2 and later releases.
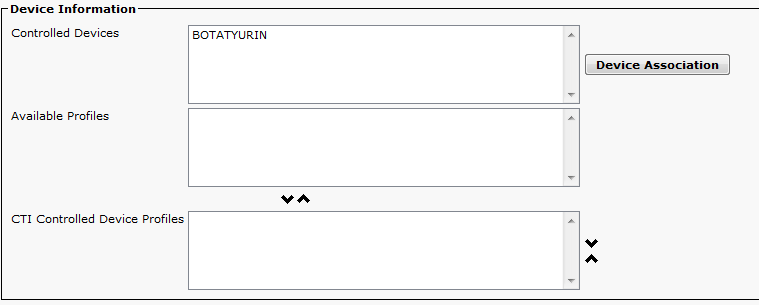
After that proceed to User Management – End User and give yourself the rights to use this device (Device Association)
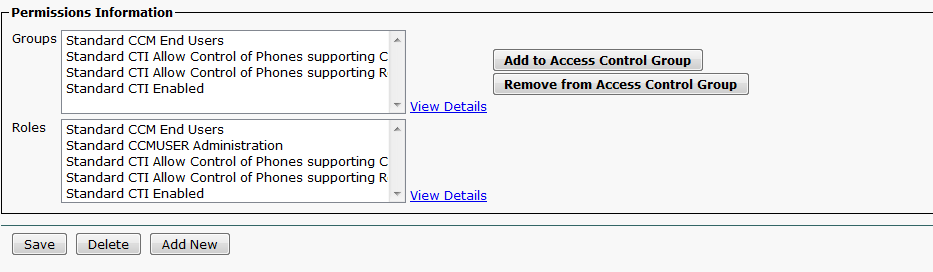
Don’t forget to ensure that you are an IM and Presence user:

And have the necessary rights:
Last but not least, a bit of Cisco magic without which you may not be able to run anything:
Jabber on Android doesn’t support HOSTNAME in Android kernel before version 4.4.4, and it’s possible that the integration with Call Manager phone services won’t happen. So, you’ll only see chat and presence features.
To solve this problem, first of all it’s necessary to specify FQDN or IP address everywhere in Jabber settings.
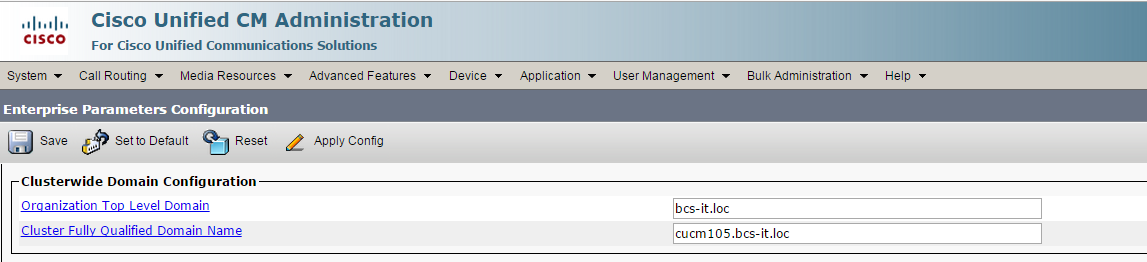
Secondly, in System – Enterprise Parameters menu in CUCM you should fill the initially empty Organization Top Level Domain field (initially empty) with the enterprise domain value.
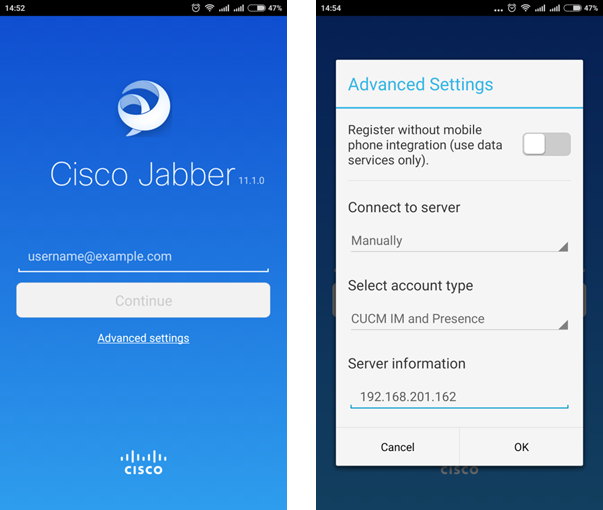
Now cross your fingers and pray to Cisco gods as we proceed to the most exciting part: the first launch and configuration of Cisco Jabber on your phone.
It launches, which is good enough. Let’s open “Advanced settings” and presume that we are clever enough to explore them. Fill out IM and Presence server address and press OK:
Fill out your username and password (End User credentials in CUCM, IM and Presence). If you haven’t made any mistakes, you may rejoice and shed tears of happiness:
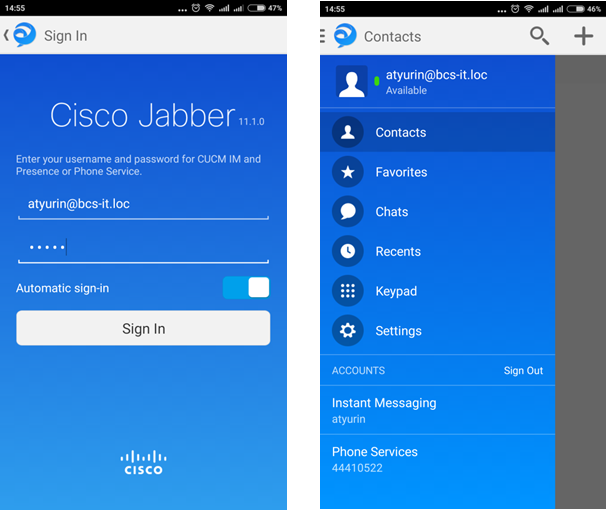
Now you can use mobile Jabber:
