 This article is about configuring Single Number Reach (aka Mobile Connect) feature in Cisco Unified Communications Manager (CUCM).
When you receive an incoming call on an extension number in a cluster, the Single Number Reach (SNR) enables rerouting the call not only to a DN, but also to a remote number. For example, that can be an employee's cell phone. If needed, you can configure rerouting to a group of remote numbers that belong to an employee.
This explains the name of this feature: Single Number Reach. After you dial the employee's extension number, you can reach this employee even if he or she is not in office. The SNR enables call routing to a specified group of numbers, so a subscriber can answer any of them.
Let's have a look at how SNR (Mobile Connect) actually works.
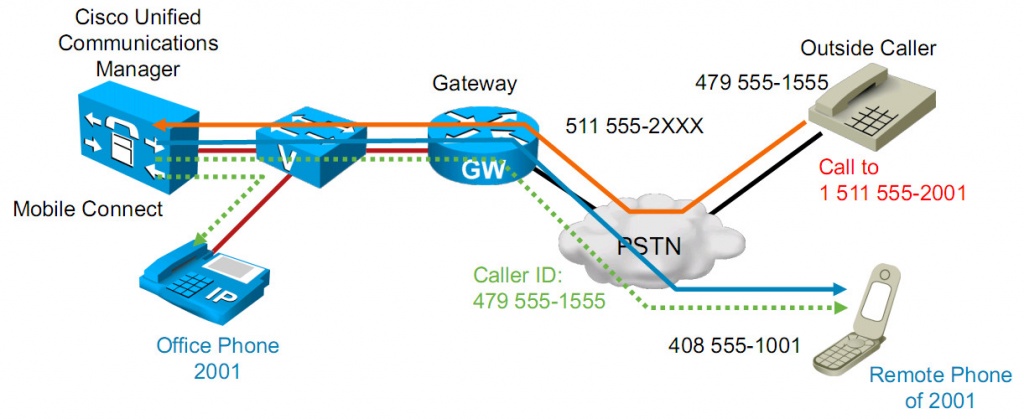
Let's assume that the subscriber with the number 479-555-15-55 dials the number 151-15-55-2001. The call is routed to a voice gateway and then to a CUCM cluster. Suppose that the last 4 digits of a public number correspond to an employee's extension number. After that the phone with the extension number 2001 will ring. Besides, if the number has the SNR feature configured, the call will be redirected to another number as well, for example, to the employee's cell phone number 408-555-10-01.
Basically, Mobile Connect provides functionality similar to Shared Line. The difference is that in this case a shared line is organized between an office phone and some remote device that isn't necessary in a cluster, not between the phones within a cluster.
The figure below illustrates this configuration:
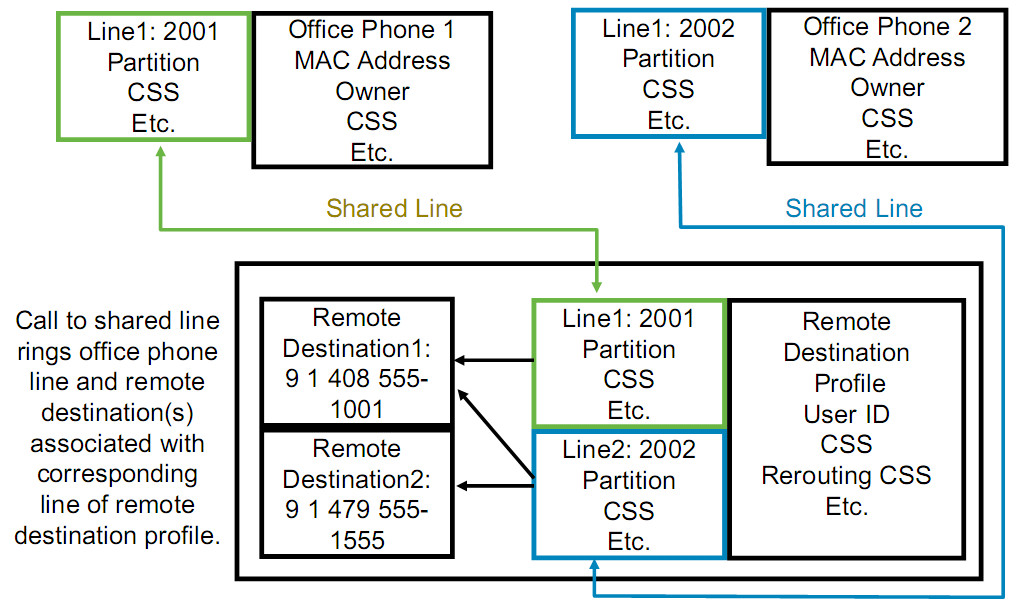
On this figure you can see that Mobile Connect creates a shared line between an office phone and a Remote Destination Profile (RDP). RDP reflects remote numbers in CUCM configuration. You can bind several Remote Destination numbers to a single DN using RDP. Note that Remote Destination Profile and Remote Destination are essential parts of Mobile Connect. Apart from them we'll also use the following entities: User, IP phone, Softkeys, Access list.
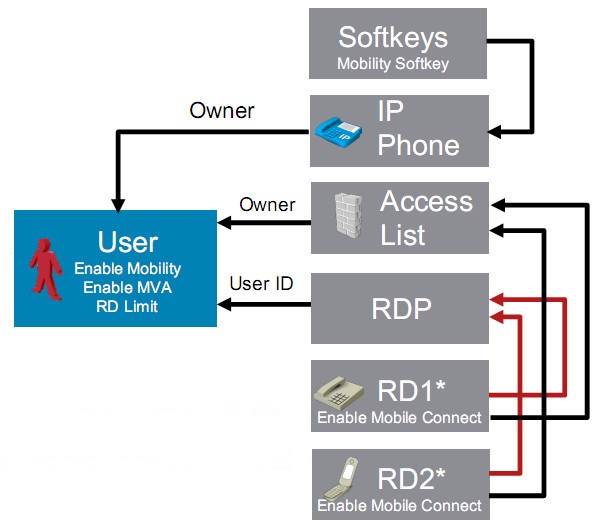
The User entity defines an end user registered in CUCM with Mobile Connect features enabled. Generally, the most important thing in CUCM is a user, not a device, because the services are provided to people, not to devices. That's why in the system a user is associated with an office phone and RDP.
Next, IP phone and Softkeys. A phone has to be associated with a certain user. The Mobile softkey provides an employee with an opportunity to redirect an active call to an office phone, if this call is coming to a cell phone. To add the Mobile button to the phone interface in on-hook mode, you'll need a Softkey Template.
Access list enables filtering incoming calls by the caller's phone number. This feature isn't necessary, but it can be handy. At first an Access list is created in the configuration parameters and then it is bound to a certain RDP.
Configuring Mobile Connect is relatively easy. First of all, you should create an End User that will be the center of all the system logic. There are several ways to create a user, but in any case the Enable Mobility option should be checked, as the figures show.
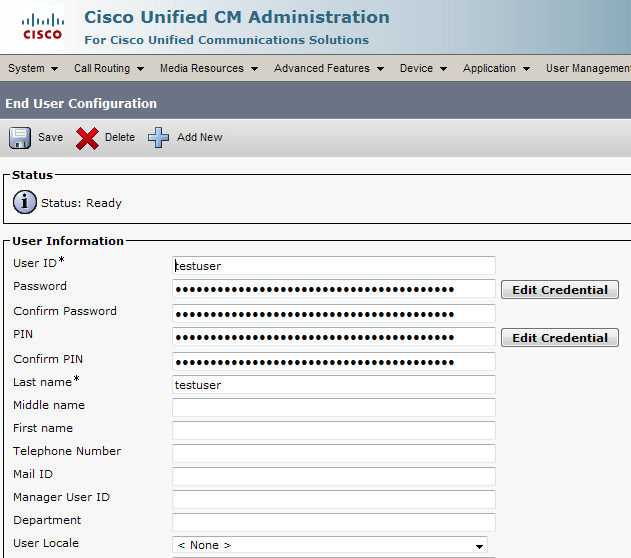
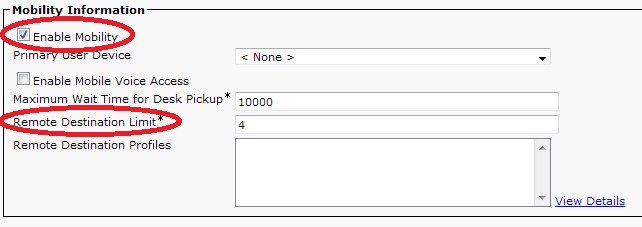
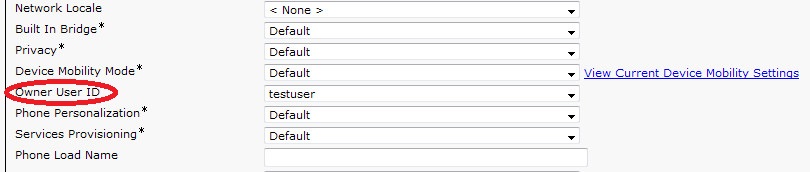
Here you can also define a limit for the quantity of remote phone numbers associated with this user. After that you should associate the user with the office phone number that he or she uses. For that purpose you can use Owner User ID in the phone parameters.
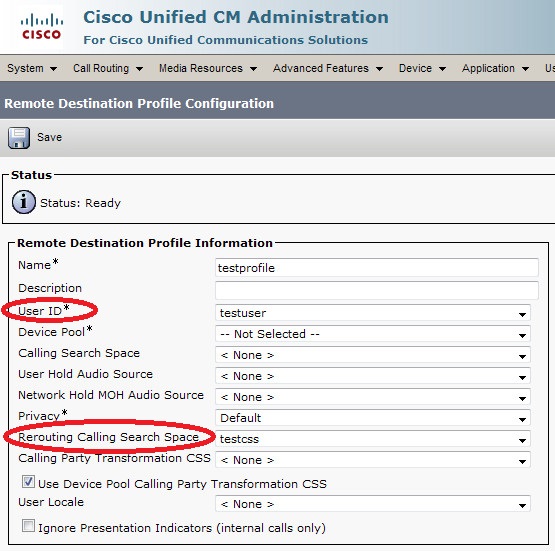
Now you can configure the entities that are essential for Mobile Connect. At first, you should create a Remote Destination Profile. To do this, proceed to Device -> Device Settings -> Remote Destination Profile.
You must specify the same End User (User ID field). Note the Rerouting Calling Search Space field. Here you can specify CSS that will be used for outgoing calls to Remote Destination numbers while processing an incoming call to an office phone. This CSS will ensure Route Pattern availability while routing an outgoing call to a Remote Destination.
Please save the RDP information. After that you'll be able to create lines. Specify the number used on the office phone that should have the calls redirected via Mobile Connect as one of the lines.
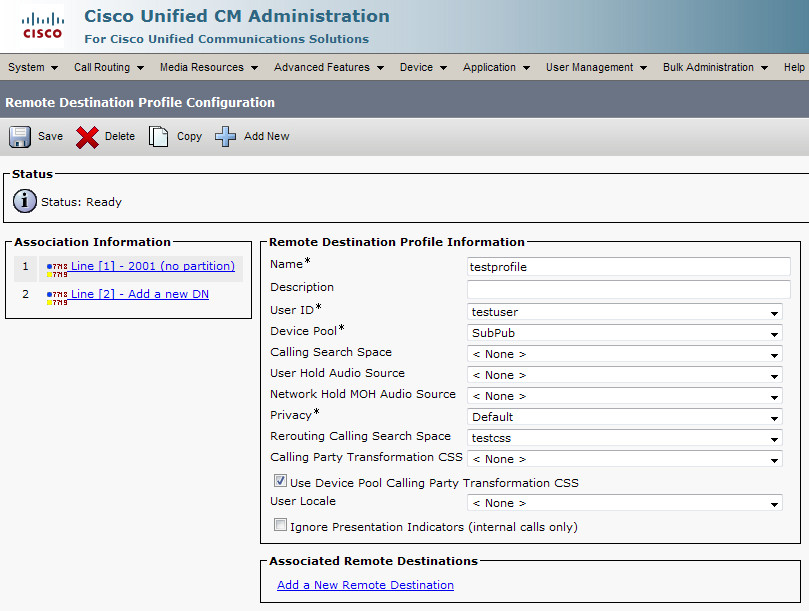
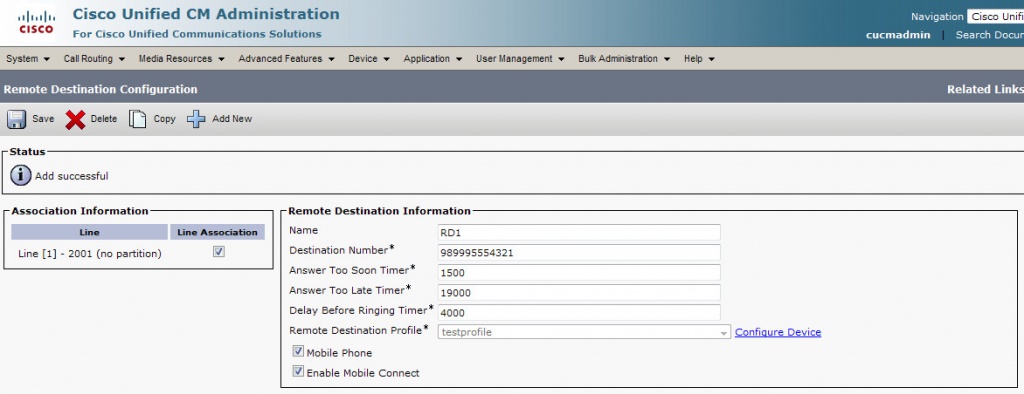
Follow the "Add a New Remote Destination" link. The Remote Destination Configuration form will appear.
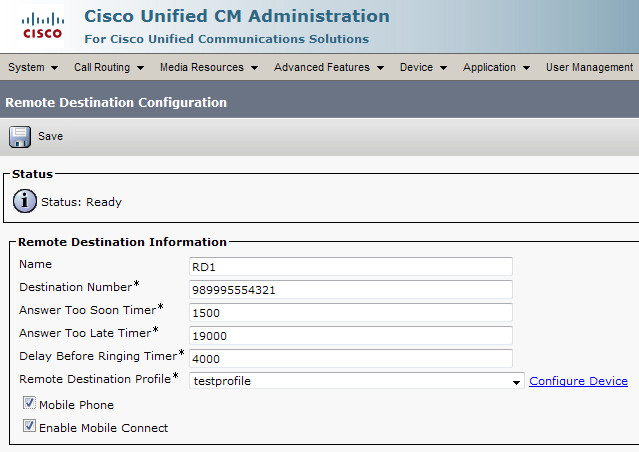
Let's have a look at the parameters we can specify. "Answer Too Soon Timer" defines the minimal time for a call to be transmitted to a Remote Destination before the user answers. This parameter helps to prevent the call from being sent to voice mail when the user's cell phone is switched off or out of coverage area. "Answer Too Late Timer" defines the maximum response timeout for a call to a Remote Destination. "Delay Before Ringing Timer" defines the delay before the CUCM redirects an incoming call to a Remote Destination. All these parameters are specified in milliseconds. It is necessary to set the Line Association mark for the number that will be associated with a remote number. It is also necessary to switch the Enable Mobile Connect option on. The Mobile Connect option enables redirecting an active incoming call from a mobile phone to a landline office phone by clicking the Mobility button on the office phone.
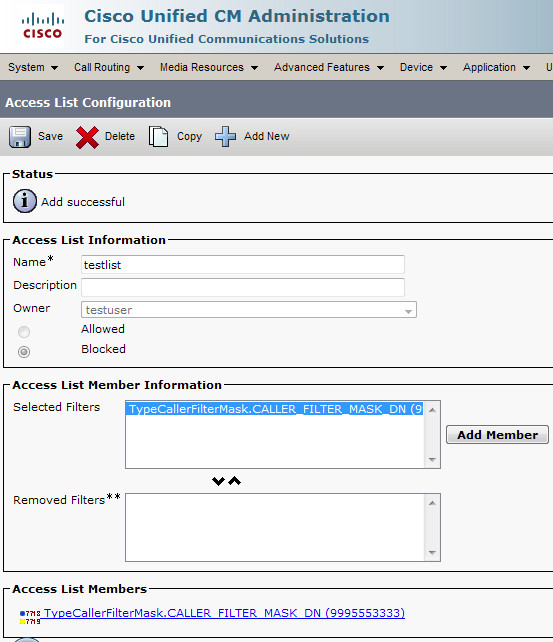
If needed, use the Access List Configuration to configure the filtering for the calls to a Remote Destination. To do this, proceed to the menu: Call Routing -> Class of Control -> Access List. Select the access list type: blacklist or whitelist (Blocked or Allowed). Then use the Add Member button to fill the list with the corresponding numbers.
Now you should bind the Access List on the Remote Destination Configuration page. You can select one of the following options: transmit the call to a remote device if the subscriber is on the list, or the opposite. You can also specify the Ring Schedule, which can permit redirecting calls to a remote number during the working hours only, for example.
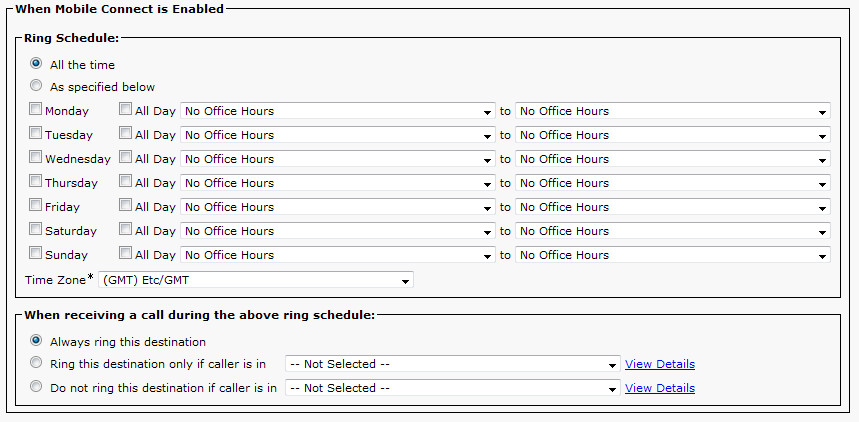
You should remember that if you configure both the schedule and call filtering, then the schedule will be checked first. So if the time is inappropriate, the access list won't be even checked.
As you can see, configuring Single Number Reach presents no great difficulty. After you configure this feature, your employees will be able to accept incoming calls on the office phone numbers not only in the office, but on their mobile and home phones as well, no matter where the call is coming from.