 Integrating Asterisk and CUCM via SIP makes it possible to combine several phone pools or, for instance, to use Asterisk as an IVR (interactive voice response system). This article gives instructions on connecting Asterisk and Cisco Unified Communications Manager through a SIP trunk.
Configuring CUCM
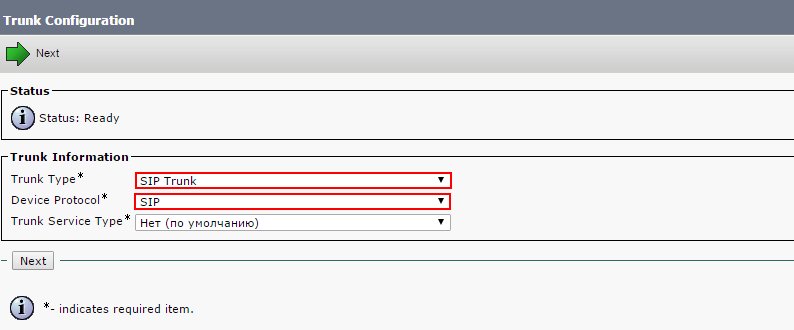
First of all, proceed to Cisco UCM configuration page. To create a new SIP trunk, select Device -> Trunk in the menu and click Add New. We are creating a SIP trunk, so fill out the Trunk Type and Device Protocol fields, as the screenshot shows:
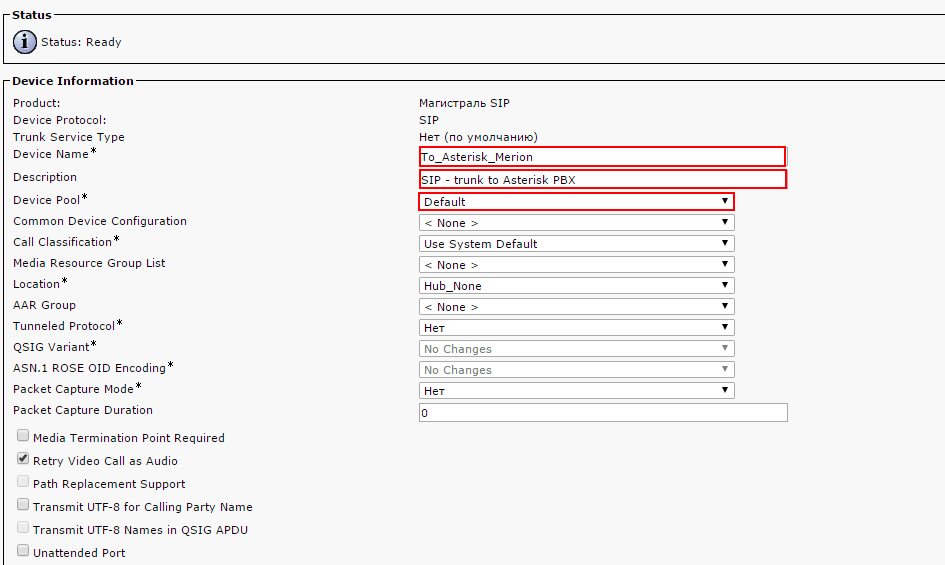
After the parameters are specified, click Next. On the page that appears, fill out the following fields:
- Device Name – enter the name of the SIP trunk to be created. This field is required.
- Description – describe the connection to be created.
- Device Pool – select a device pool for the SIP trunk. It should coincide with the devices routed through this trunk. This field is required.
Scroll down to the section titled Inbound Calls and fill out the following field:
- Calling Search Space – CSS name for the SIP trunk. It should coincide with the devices routed through this trunk.

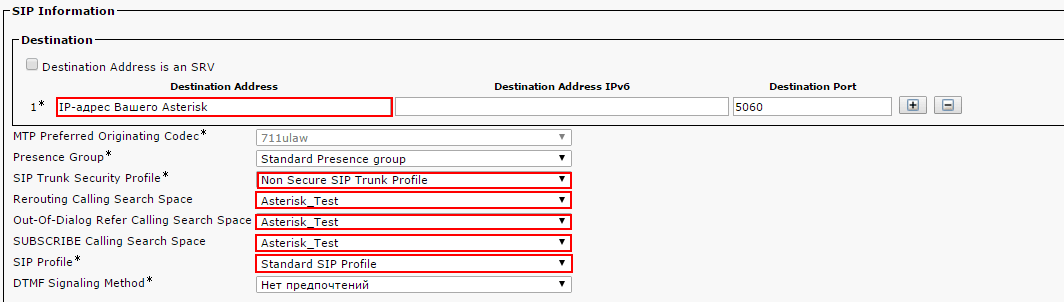
To finish the system configuration, proceed to the section titled SIP Information, sub-section Destination. Fill out the following fields:
- Destination Address – enter the IP address of your Asterisk server. This field is required. Note that the default destination port is 5060. If your Asterisk server has a different SIP listen port, enter it in the Destination Port field.
- SIP Trunk Security Profile – select Non Secure SIP Trunk Profile. This field is required.
- Rerouting Calling Search Space – select the same CSS that you have selected in Inbound Calls section.
- Out-Of-Dialog Refer Calling Search Space – similarly to the previous item, select the same CSS.
- SUBSCRIBE Calling Search Space – select the same CSS.
- SIP Profile – select Standard SIP Profile.
Click Save. You can use patterns (see Route Pattern settings) to configure routing to the SIP trunk.
Configuring Asterisk
You can carry out SIP trunk configuration process on the side of Asterisk through the FreePBX 13 graphical environment. To configure a trunk, proceed to Connectivity -> Trunks. Click Add Trunk to create a new SIP trunk.
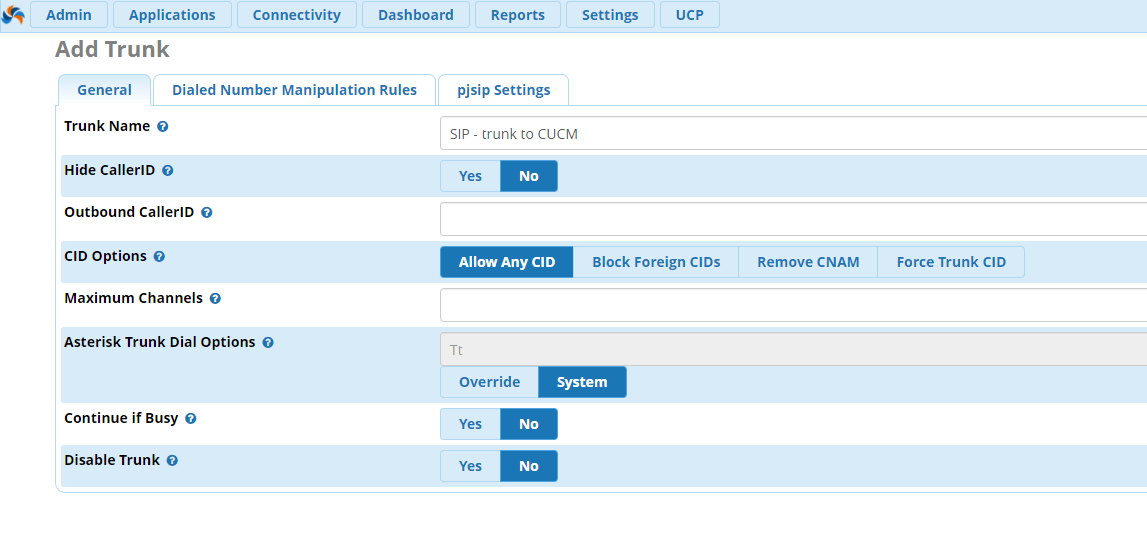
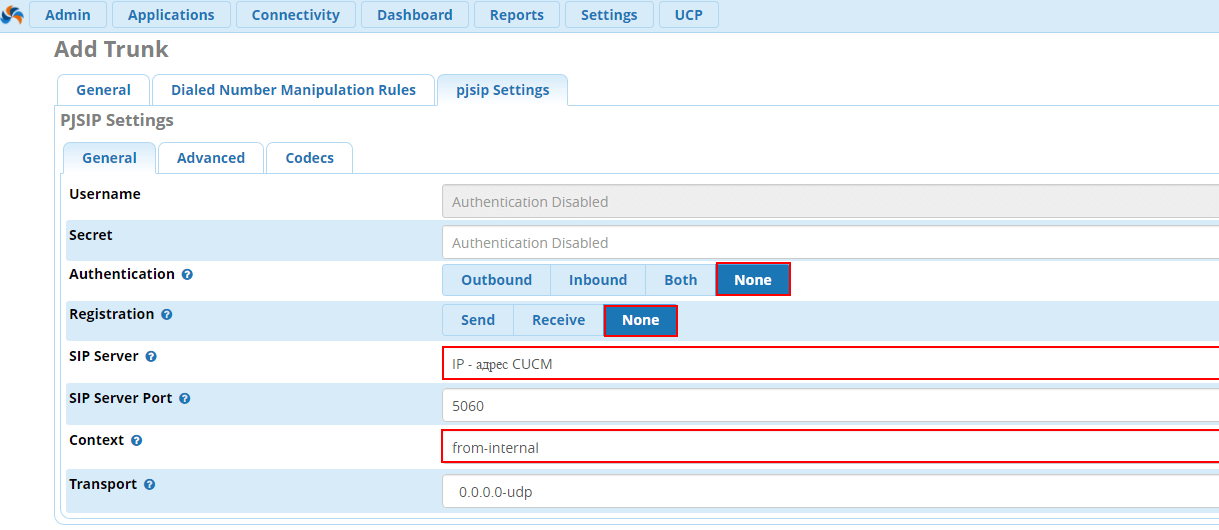
On the General tab, enter the trunk name. Then proceed to the pjsip Settings tab. We don’t use username/password authentication to configure a SIP trunk between Asterisk and CUCM, so select the following options:
- Authentication – select None. As mentioned before, we won’t need username/password authentication.
- Registration – select None.
- SIP Server – enter the Cisco UCM IP address.
- Context – enter from-internal context
Proceed to the Advanced tab:
- Qualify Frequency – enter 60. This is the delay (in seconds) between the keep-alive messages being sent to check the trunk’s state.
- From Domain – enter your CUCM IP address.
Click Submit and then Apply Config.
As the final step, you should configure call routing for this trunk.