In the previous part of this article we’ve discussed the basic configuration and certificate installation process.
In this part we’ll continue getting into the details of CMS deployment in a failover cluster.
Database Cluster
You have uploaded all certificates to your CMS servers. Now you can set up and turn the database clustering on for 3 nodes. The first step is to choose one server as a master database node and set it up.
Master Database
The first step of database replication setup is to select the certificates that will be used for the database. Use the following command:
database cluster certs <server_key> <server_crt> <client_key> <client_crt> <ca_crt>
Now configure the interface that will be used for DB clustering:
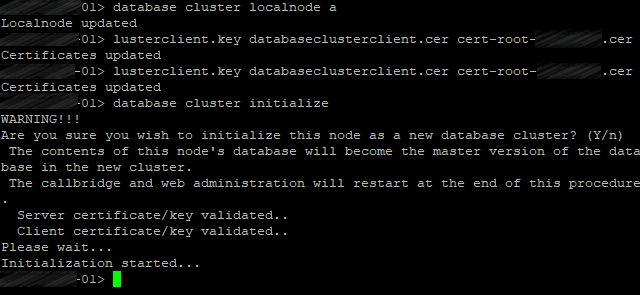
database cluster localnode a
Now initialize the cluster’s database on the master server:
database cluster initialize
Client Database Nodes
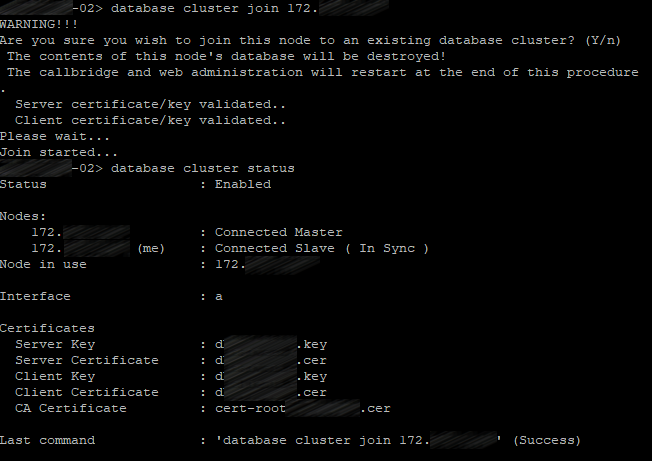
Perform the same actions, but use the following command instead of database cluster initialize:
database cluster join <ip address existing master>
with <ip address existing master> standing for the IP address of CMS server where the cluster was initialized (master server).
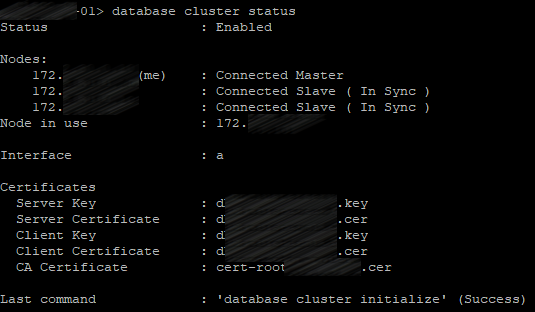
Check the database cluster status on all servers:
database cluster status
The same for the third server.
The first server will be the master server; two others will be slave servers.
Web Admin Service
Turn on the Web Administrator service:
webadmin listen a 445
Port 445 has been chosen because port 443 is used for users' access to web client.
Configure the certificate files for Web Admin service:
webadmin certs <keyfile> <certificatefile> <ca bundle>
Enable Web Admin:
webadmin enable

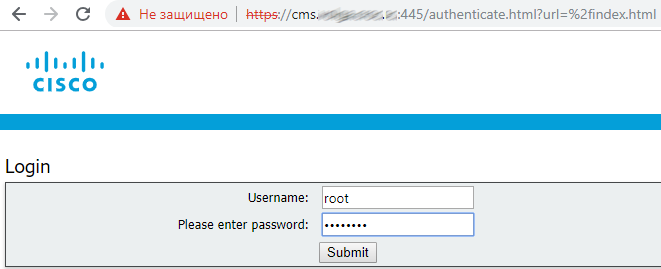
If everything is right, you’ll get SUCCESS lines saying that Web Admin certificates and network have been configured correctly. Use your web browser to make sure that the service is working: enter the Web Admin address, e.g. cms.example.com:445
Call Bridge Cluster
Call Bridge is the only service that is included in every CMS deployment. Call Bridge is the main conferencing tool. It also provides SIP interface, so calls can be routed to or from it, by Cisco Unified CM, for example.
The following commands should be executed on each server with corresponding certificates.
Link certificates with Call Bridge service:
callbridge certs <keyfile> <certificatefile>[<cert-bundle>]
Bind Call Bridge services to the required interface:
callbridge listen a
And restart the service:
callbridge restart

Now, with Call Bridges configured, we can set up Call Bridge clustering. It is different from database or XMPP clustering. Call Bridge Cluster may support from 2 to 8 nodes without any restrictions. It provides redundancy as well as load balancing, so conferences can be actively distributed between Call Bridge servers. CMS has additional features, Call Bridge groups and associated features that can be useful for further management.
Bridge clustering is mostly set up through Web Admin interface.
The following procedure should be performed on each server in the cluster.
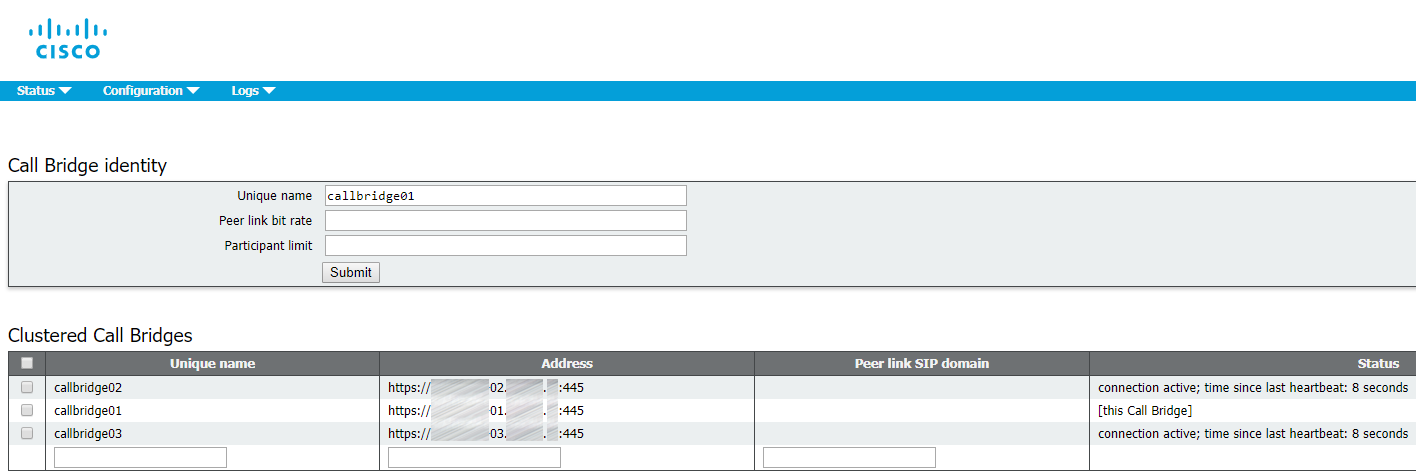
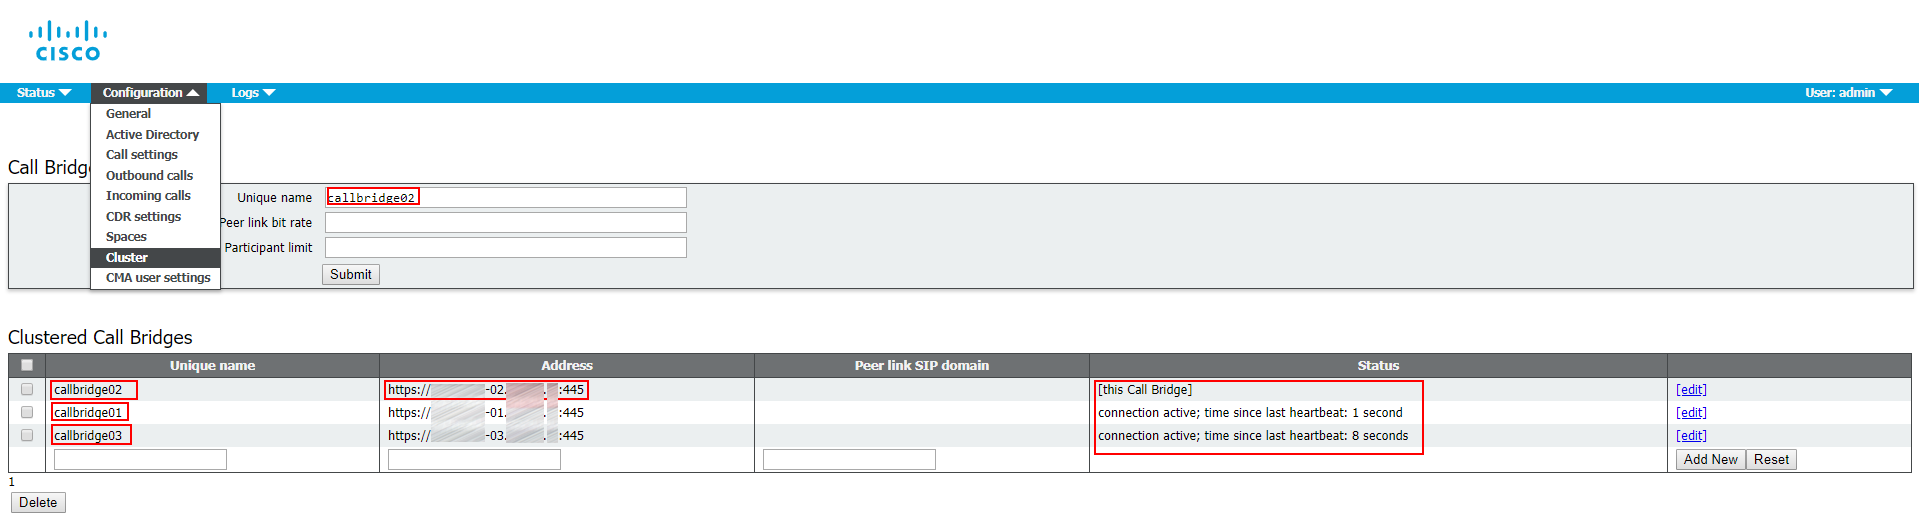
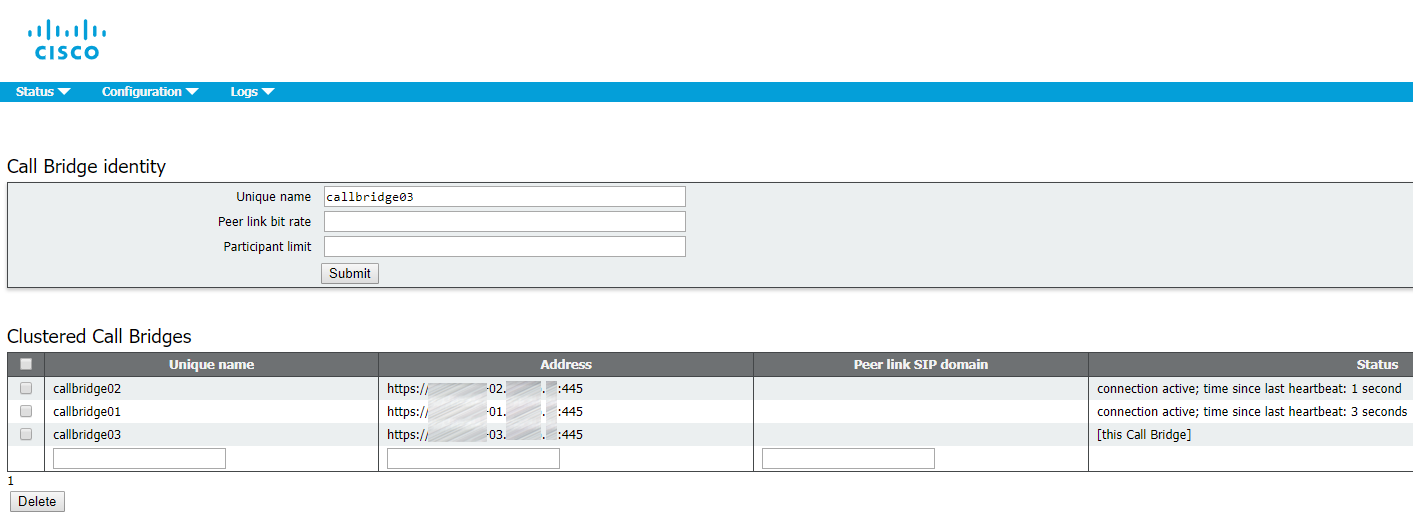
1. Proceed to Web Admin: Configuration > Cluster.
2. In Call Bridge identity: enter callbridge[01,02,03] (corresponding to the server name) as a Unique name. You can use any names that are unique for this cluster. They are descriptive, because they indicate the server identifiers (01,02,03).
3. In Clustered Call Bridges: enter your clustered servers’ Web Admin URLs in the Address field: cms[01,02,03].example.com:445. Make sure to specify the port number. You can leave Peer link SIP domain field empty.
4. Add the certificate bundle (file containing all your servers’ certificates) as a trusted certificate for each server’s Call Bridge:
callbridge trust cluster <trusted cluster certificate bundle>
And restart the service:
callbridge restart
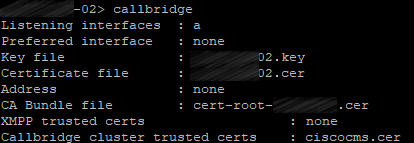
So, for each server it should look like this:
XMPP Cluster
In CMS, XMPP service is used to process all registration and authentication for Cisco Meeting Apps (CMA), including CMA WebRTC web client. Call Bridge also functions as XMPP client for authentication purposes, so it should be configured the same way as the other clients. XMPP fault tolerance is a feature that is supported in enterprise environments starting from version 2.1.
The following commands should be executed on each server with corresponding certificates.
Link certificates with XMPP service:
xmpp certs <keyfile> <certificatefile>[<cert-bundle>]
Set the interface to listen:
xmpp listen a
XMPP service needs a unique domain name. It is used for users’ authentication. When users try to log in via CMS application (or a WebRTC client), they enter userID@logindomain. In our case, it is userid@conf.example.com. Why isn’t it just example.com? In this specific deployment we have chosen example.com as the Unified CM domain for Jabber users, so we need another domain for CMS users, so calls from and to CMS can be routed through SIP domains.
Set XMPP domain:
xmpp domain <domain>
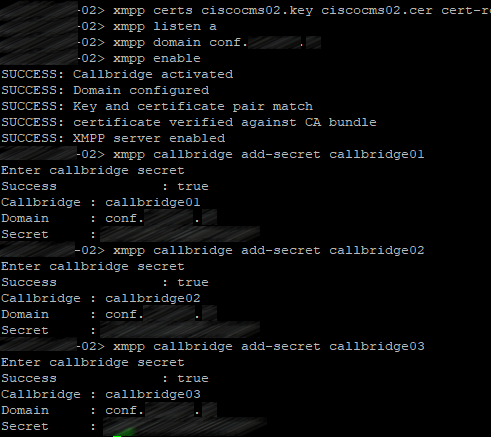
Enable XMPP service:
xmpp enable
In XMPP service, you should create a user account for each Call Bridge. These accounts will be used for XMPP registration. You can use any names (they are not related to the unique names you have configured for Call Bridge clustering). You should add 3 call bridges on one XMPP server, and then enter the same authentication data on other clustered XMPP servers, because this configuration won’t be placed into the clustered database. Later we’ll configure each Call Bridge to use that name and secret for XMPP registration.
Now we should configure XMPP service on the first server. There are three Call Bridges: callbridge01, callbridge02 and callbridge03. Each account will get a random secret. Those secrets will be used later on other Call Bridge servers to log in to this XMPP server. Enter the following commands:
xmpp callbridge add callbridge01
xmpp callbridge add callbridge02
xmpp callbridge add callbridge03
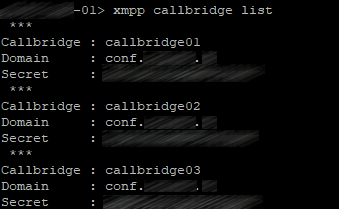
Check the result:
xmpp callbridge list
You should get the same picture on other servers after you perform the following actions.
Create identical accounts on two other servers:
xmpp callbridge add-secret callbridge01
xmpp callbridge add-secret callbridge02
xmpp callbridge add-secret callbridge03
Be careful not to put unnecessary spaces in secrets.

So, you should get the following picture on all servers:
Add the certificate bundle (file containing all your servers’ certificates) as a trusted certificate on each clustered server:
xmpp cluster trust <trust bundle>
Enable XMPP cluster mode on each clustered server:
xmpp cluster enable
Initialize XMPP cluster on the first server in the cluster:
xmpp cluster initialize
Join XMPP clusters on other servers:
xmpp cluster join <ip address head xmpp server>
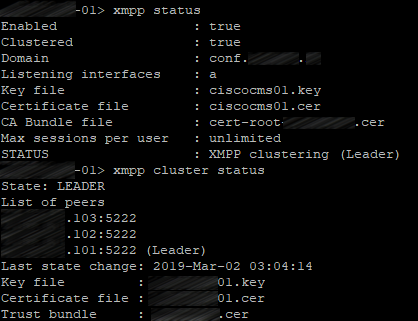
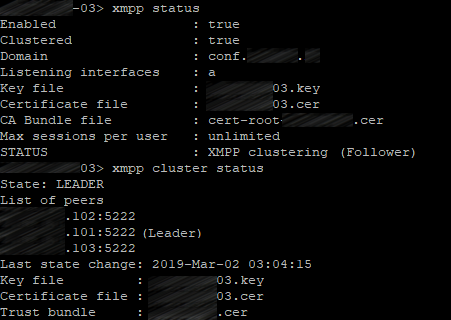
Check the XMPP cluster status on each server:
xmpp status
xmpp cluster status
The first server:
The second server:
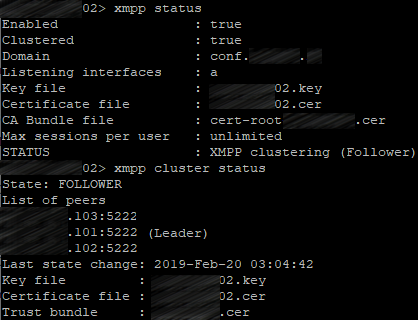
The third server:
Connecting Call Bridge to XMPP
Now your XMPP cluster is online. The next step is to configure Call Bridge services to connect to the XMPP cluster. This configuration step should be performed via Web Admin.
On each server you should proceed to Configuration > General and fill the Unique Call Bridge name field with the corresponding names: callbridge[01,02,03]. The Domain is conf.example.com, and secrets can be listed on any server in the cluster:
xmpp callbridge list

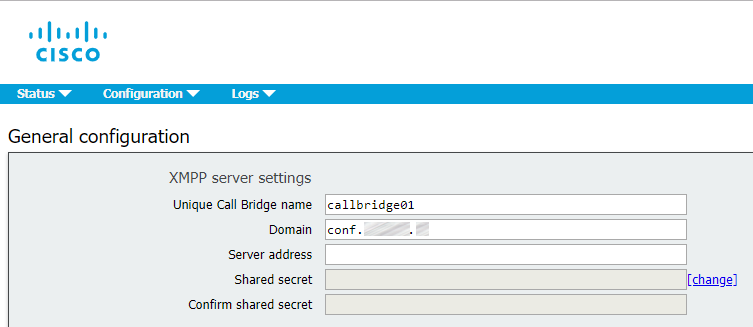
Leave the Server address field empty. Call Bridge will search DNS SRV records for _xmpp-component._tcp.conf.example.com to find an available XMPP server. The IP addresses used to connect to XMPP may be different on each server, depending on the values that will be found for _xmpp-component._tcp.conf.example.com for each Call Bridge, which depends on the priority settings for this DNS record.
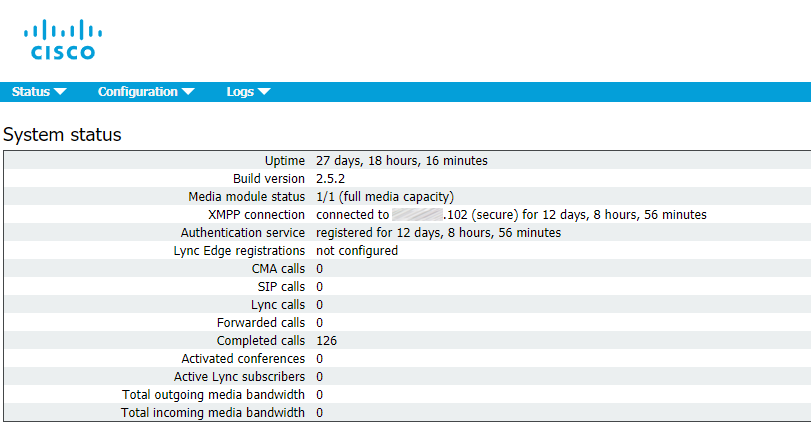
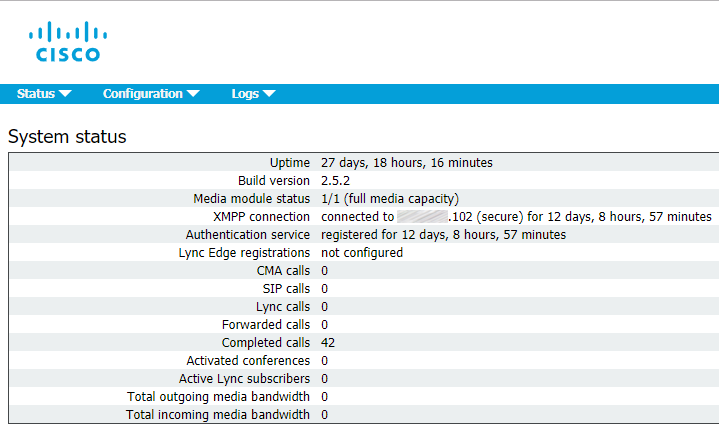
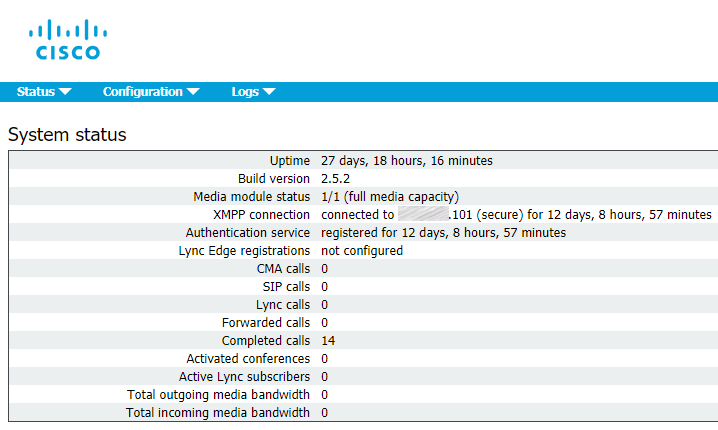
Now proceed to Status > General to make sure that Call Bridge service has successfully established a connection to XMPP service.
Web Bridge
Enable Web Bridge service on each clustered server:
webbridge listen a:443
Set up the certificates for Web Bridge service:
webbridge certs <keyfile> <certificatefile> <ca bundle>
Web Bridge supports HTTPS. It will redirect HTTP to HTTPS if http-redirect is enabled.
Use the following command to enable it:
webbridge http-redirect enable
Use the following command to make Web Bridge trust the connections from Call Bridge:
webbridge trust <certfile>
with <certfile> standing for the certificate bundle (file containing all your clustered servers’ certificates).
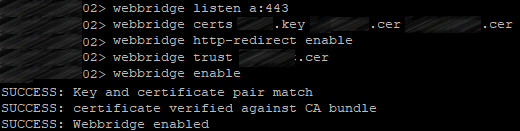
So, you should get the same picture on each server:
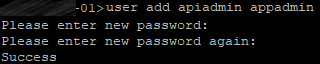
Now create a user with appadmin role. You need this user to configure your cluster with settings being applied to each server automatically instead of configuring each server separately.
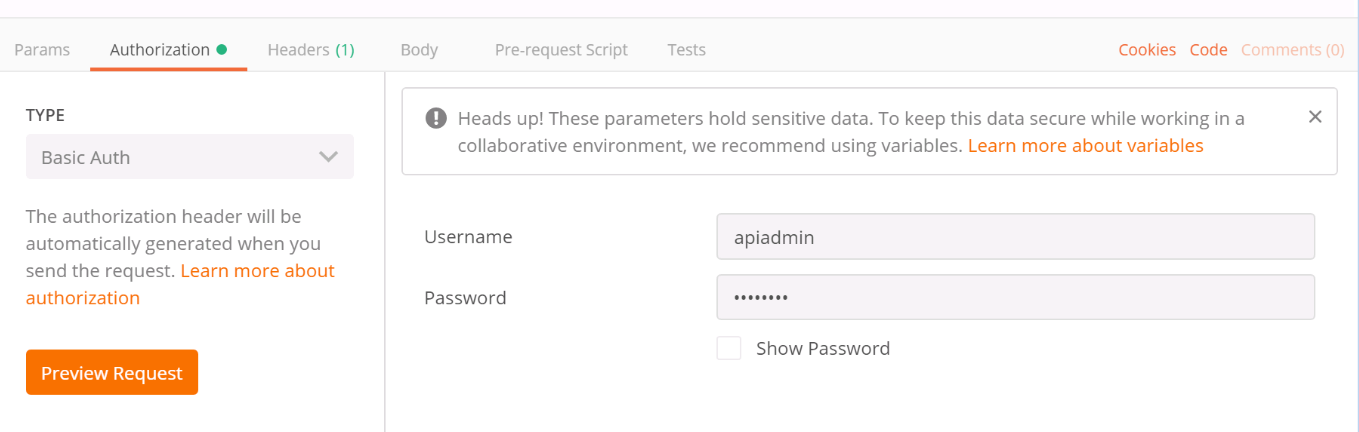
Use Postman (https://www.postman.com/downloads/) for further configuration.
Choose Basic Auth in the Authorization section.
Set the correct encoding for the commands sent to CMS.
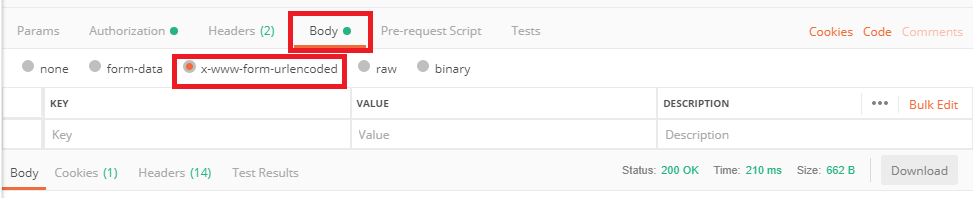
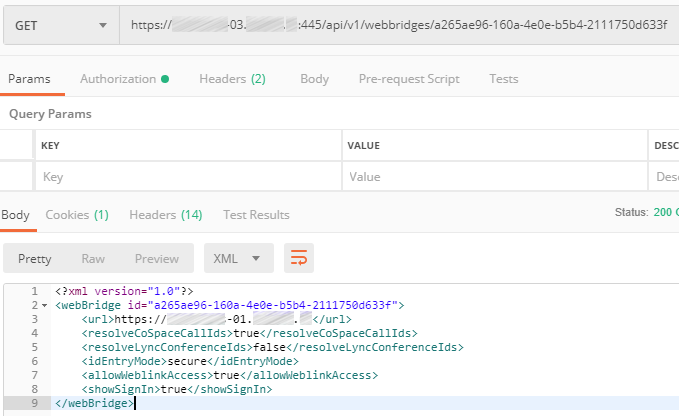
Configure a POST command for Web Bridges with url parameter set to cms.example.com:

Set the required parameters for each WebBridge: guest access, secure entry mode, etc.
So, we have configured database, Call Bridge and XMPP clusters, as well as Web Admin service. We have also connected Call Bridge to XMPP and performed the Web Bridge configuration.
In the last part of the article, we’ll finish discussing the details of CMS clustered deployment and configuration.
Read also:
- Part 1 - Cisco Meeting Server Cluster: Scalability and Resilience deployment with meeting recording
- Part 2 - Cisco Meeting Server Cluster: Scalability and Resilience deployment with meeting recording
- Part 3 - Cisco Meeting Server Cluster: Scalability and Resilience deployment with meeting recording
This article is a translation of a guide originally created by S. Dubinin, Telecommunications Specialist - https://habr.com/ru/post/434240/